
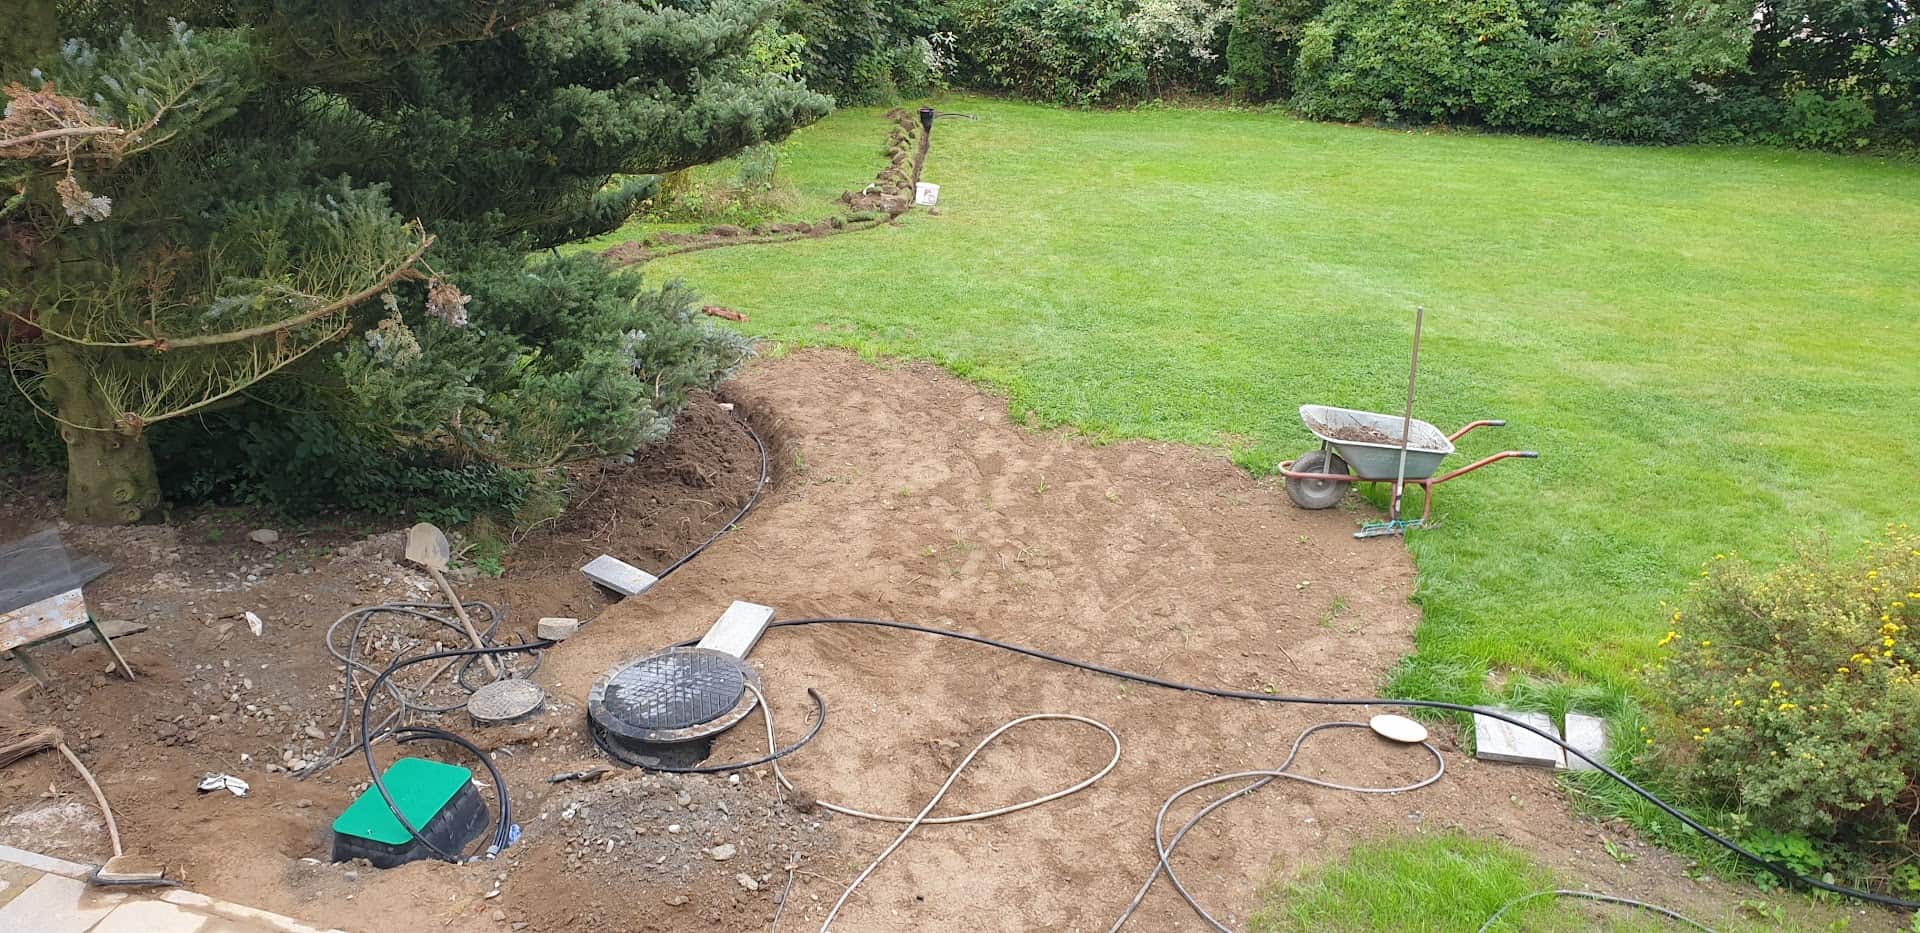
With our cistern, which we got last year as a buffer and with the new pipes for rainwater drainage, there is plenty of free water from the roof. At least when it rains again one day.
We have therefore laid pipes for automatic irrigation on the property, using the Gardena irrigation system, as these components were cheaper last year than the alternatives from Hunter or Rainbird.
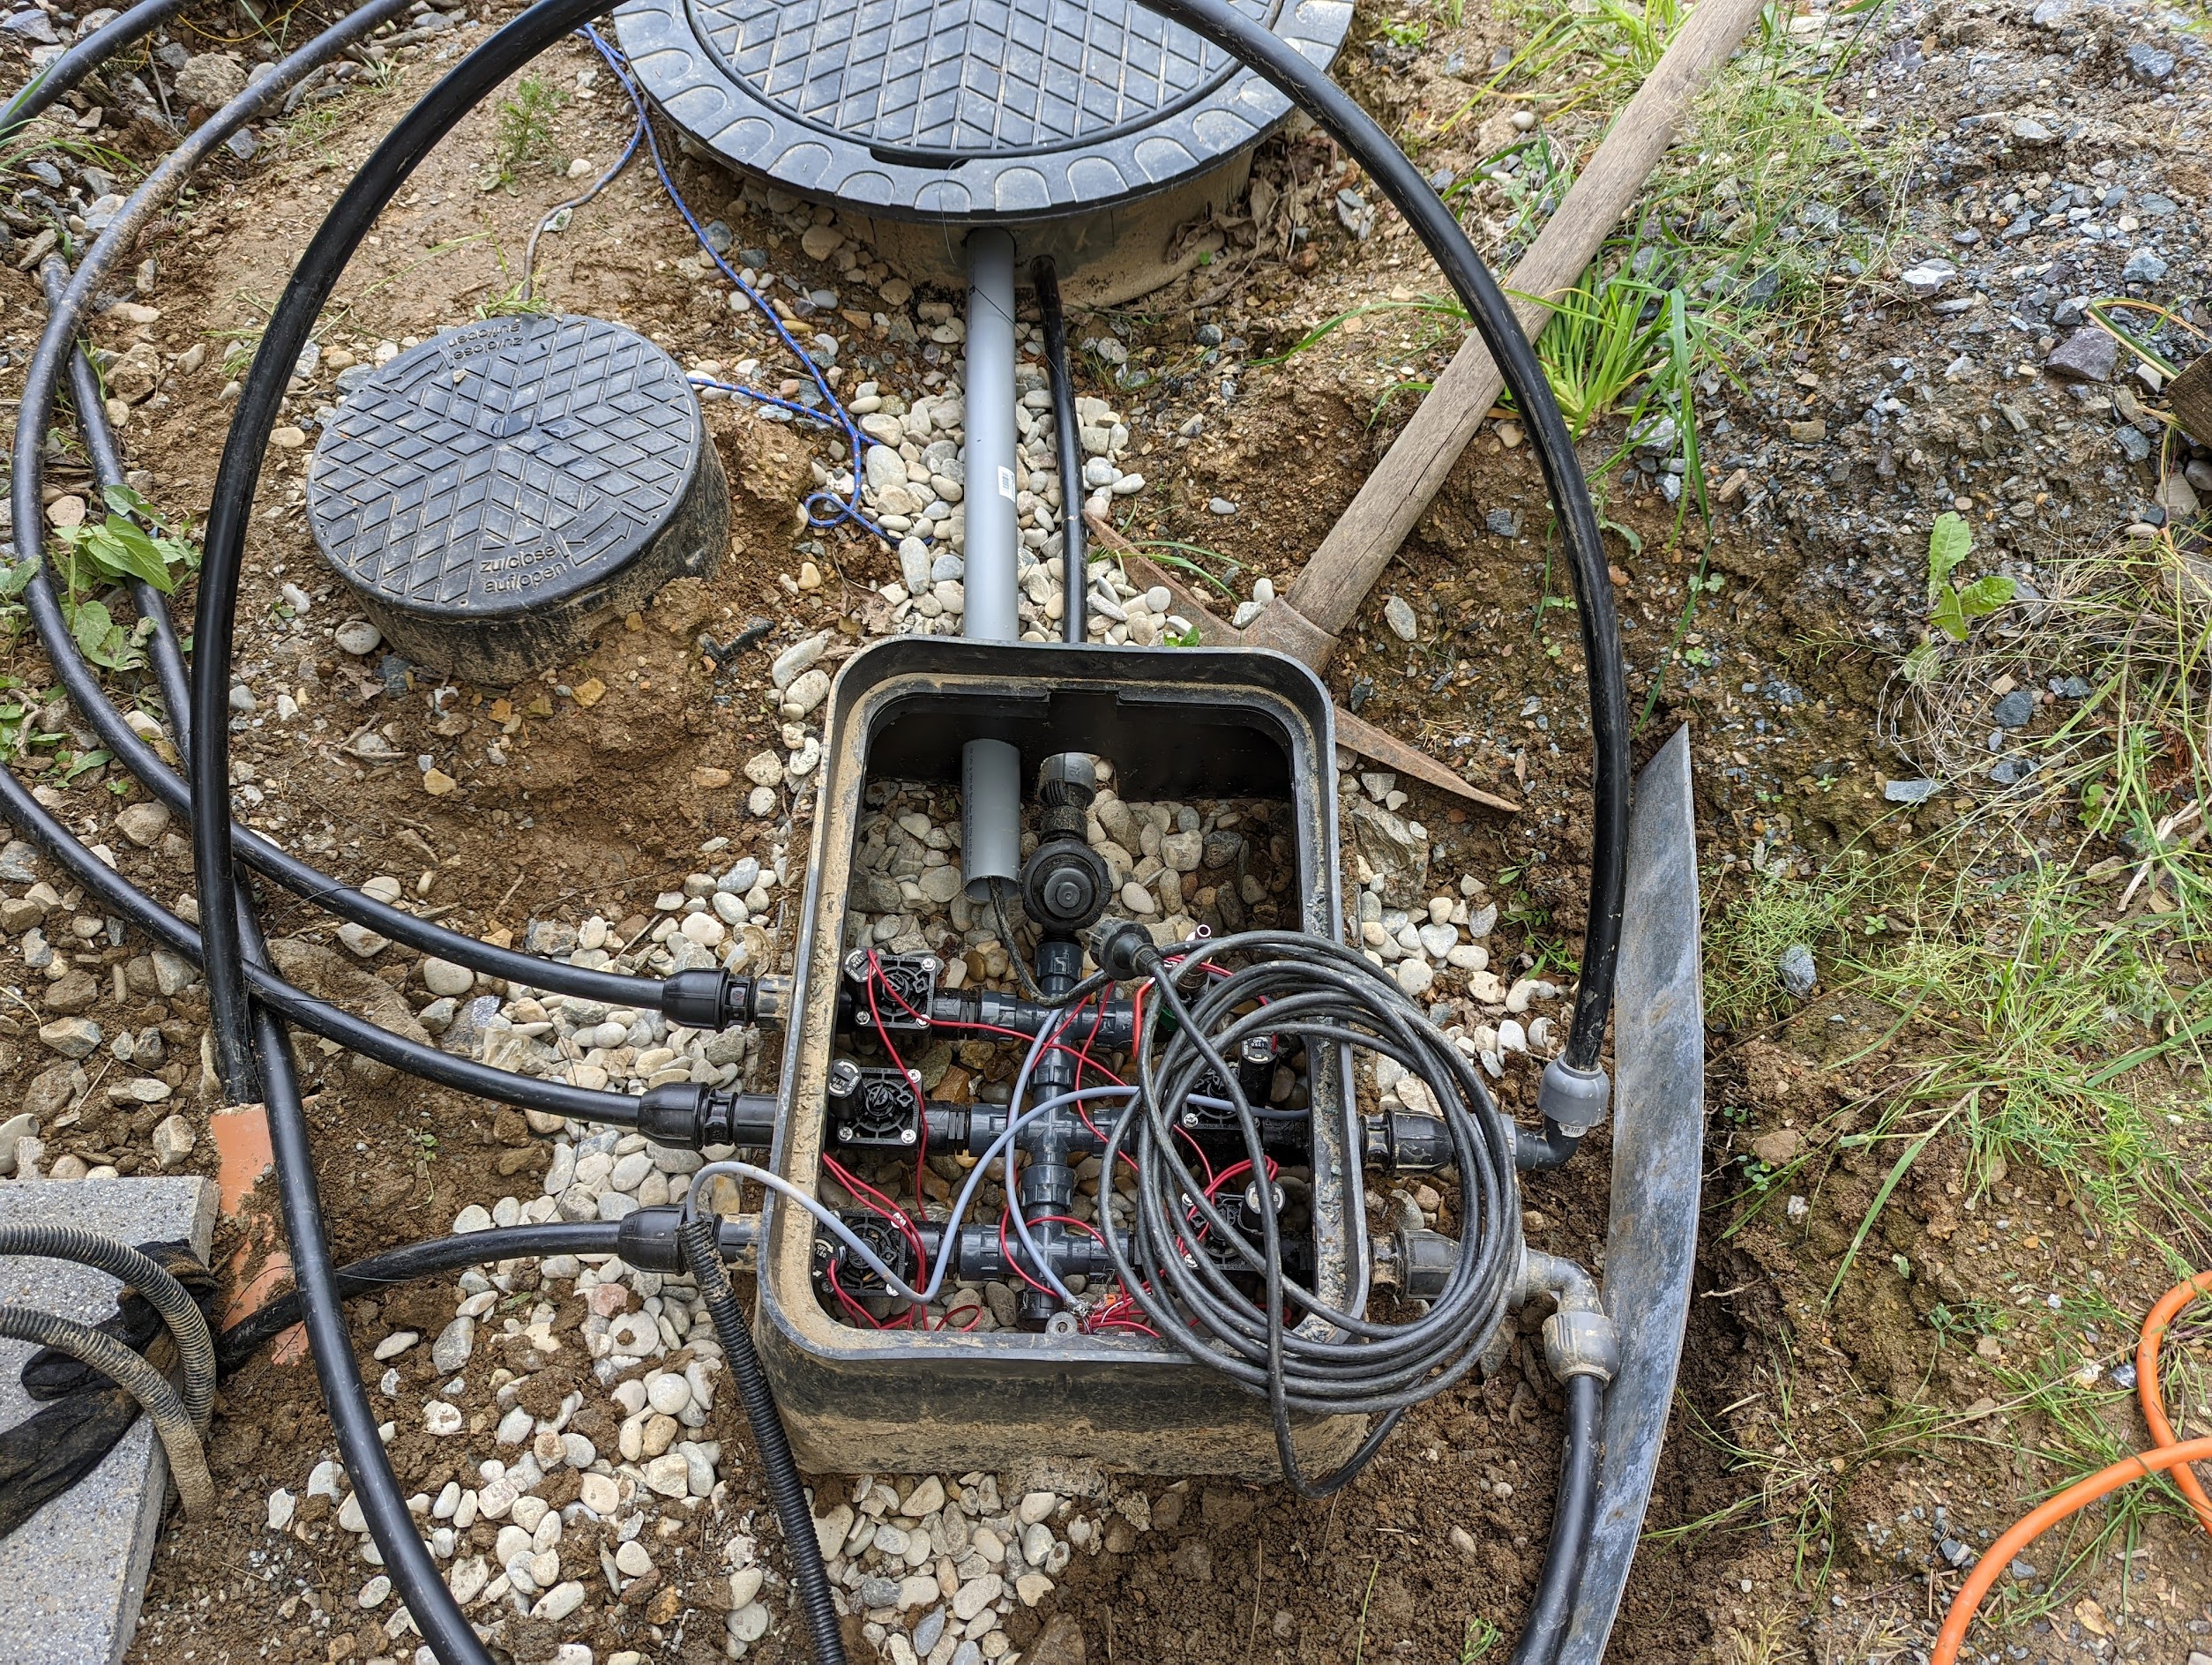
We control 5 individual circuits via 5 valves:
- East lawn irrigation
- West lawn irrigation
- Raised bed / flower beds
- Front garden
- Water outlet in the driveway
The material used was
- 50 metres of Gardena laying pipe 25 mm
- 4 Gardena water sockets
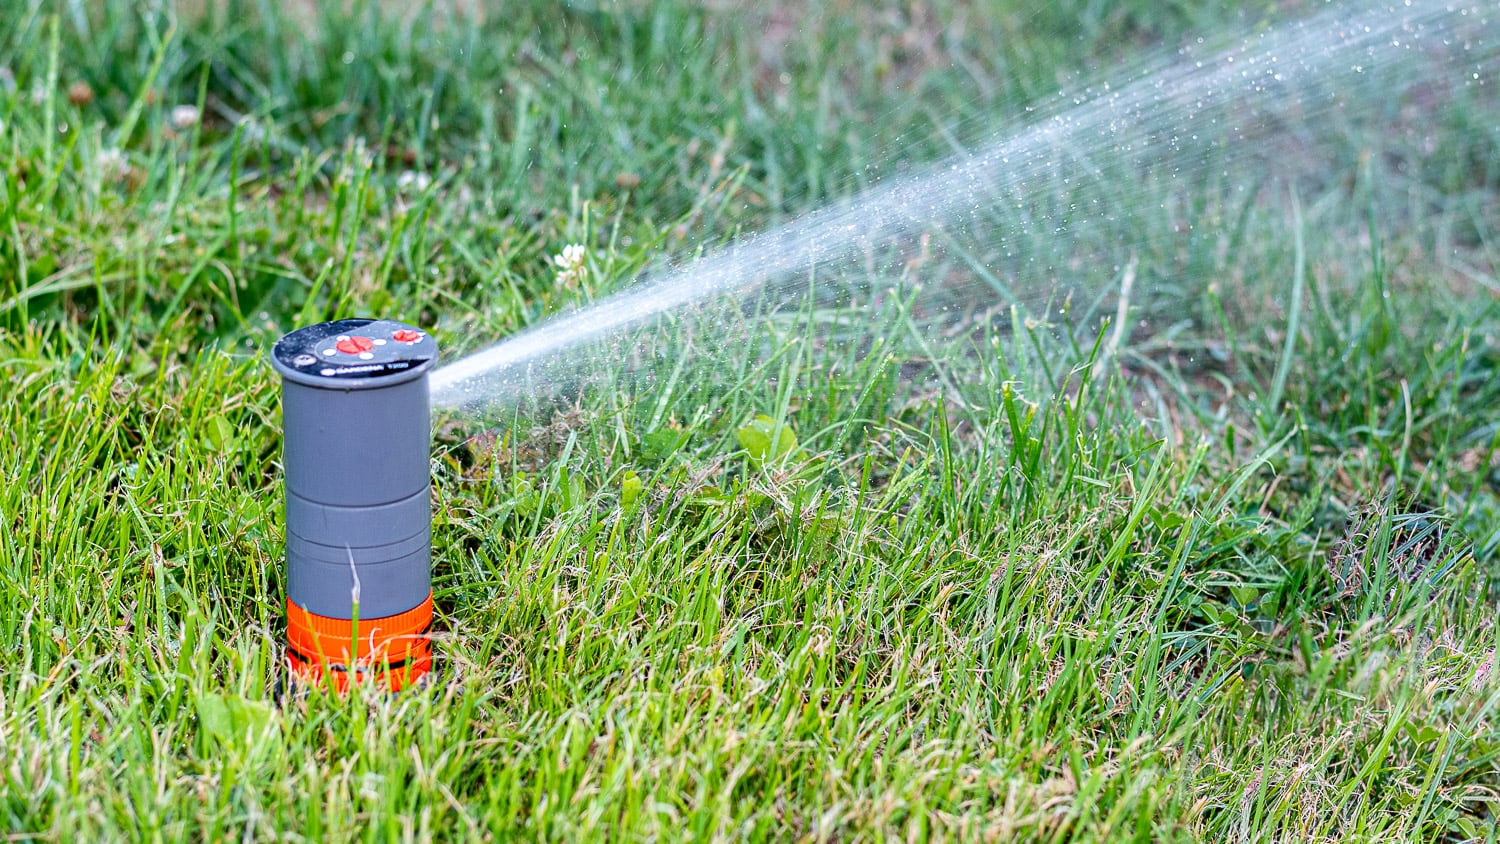
- 3 Gardena T250 pop-up sprinklers
- 2 Gardena T380 pop-up sprinklers
- Several Gardena bends and T-pieces
- No-name valve box with 5 Hunter valves with flow control and ball valve with compressed air adapter for drainage/frost protection
- Renkforce submersible pressure pump
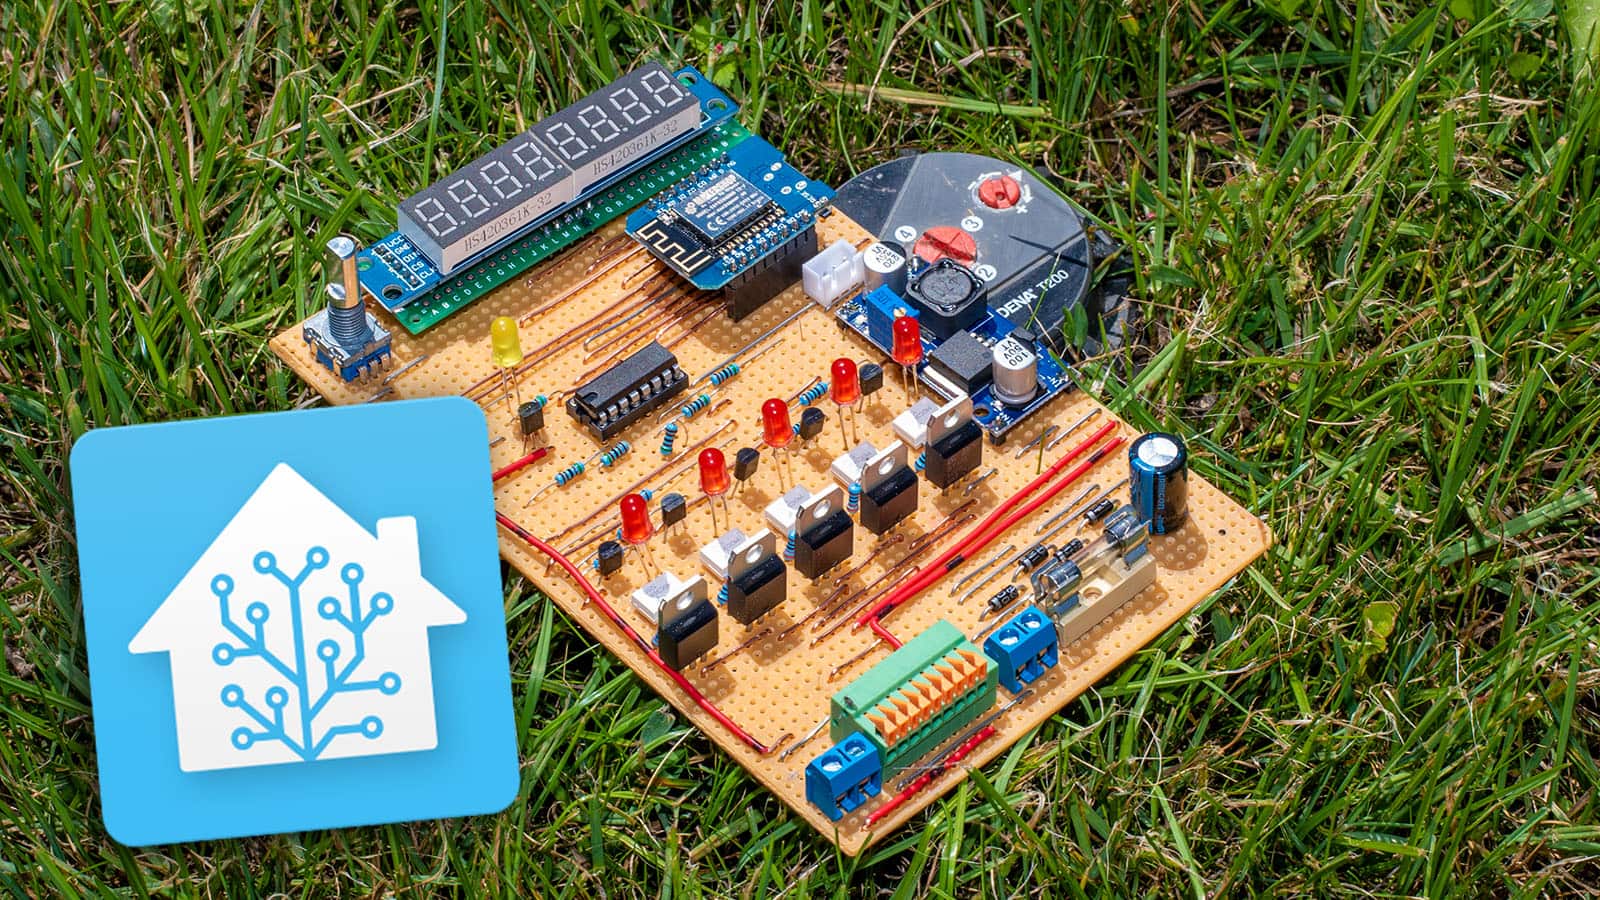
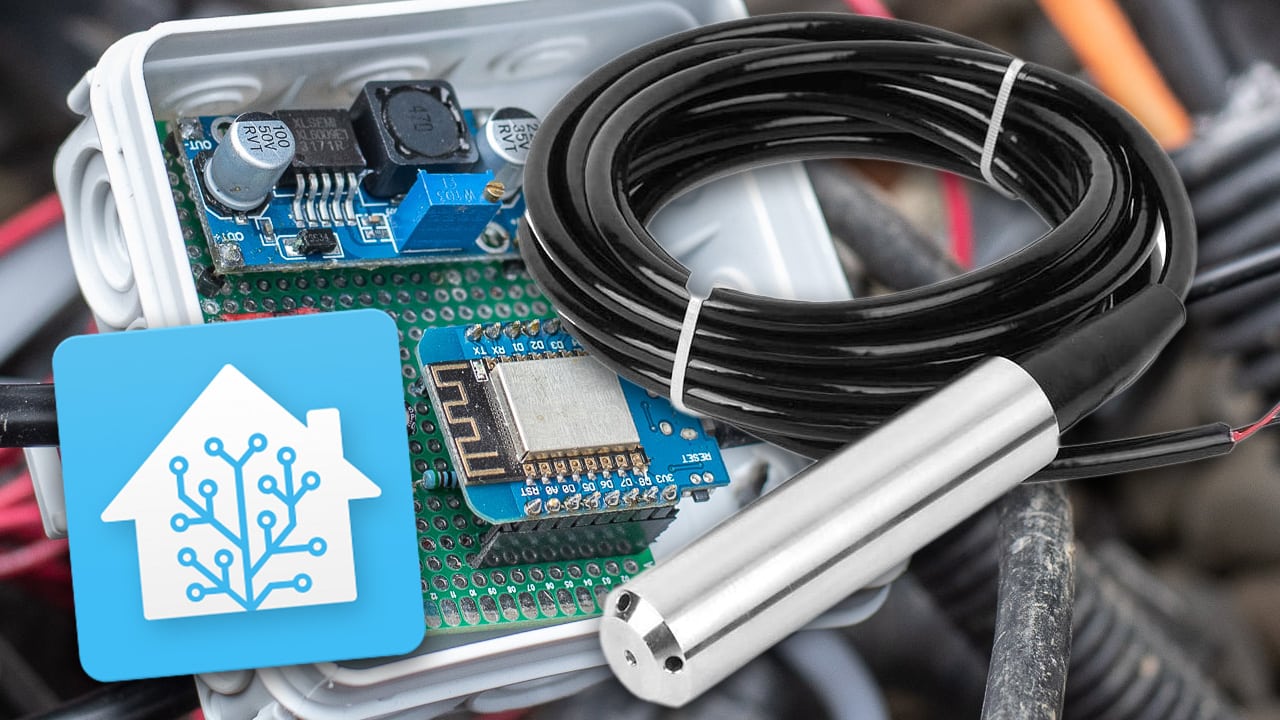
The electronics of the Waterking
The typical irrigation valves are controlled with 24 volts alternating current. According to the data sheet, the switch-on current is 370 mA, the holding current 210 mA. According to my measurements, the actual values were somewhat lower.
As all the valves are never in operation at the same time because otherwise the water pressure would drop too much (even with the 4 bar submersible pressure pump), a 24 volt AC power supply with 1 ampere is sufficient. I still had this from an old outdoor light chain. You can also find suitable power supply units on Ebay.
If the valves were operated with DC voltage, the cores of the electromagnets could become permanently magnetised and the valves would “stick”. In the worst case, the core would become saturated, which could mean a higher current flow and thus the destruction of the coils.
Therefore, MOSFETs cannot be used for simple control. The simplest solution would be relays, but I didn’t want to rely on that. Firstly, the contacts can corrode and the simple Chinese relays, which are available ready-made as 4 or 8-pin boards, are not necessarily suitable for switching low voltage. This sounds paradoxical, but most alloys used for relay contacts (AgCdO for these relays) require a short arc, which only occurs at higher voltages and currents (the so-called frit current). This burns away oxides, which ensures a permanently good contact. As there is also high humidity in the shed, relays were ruled out for me.
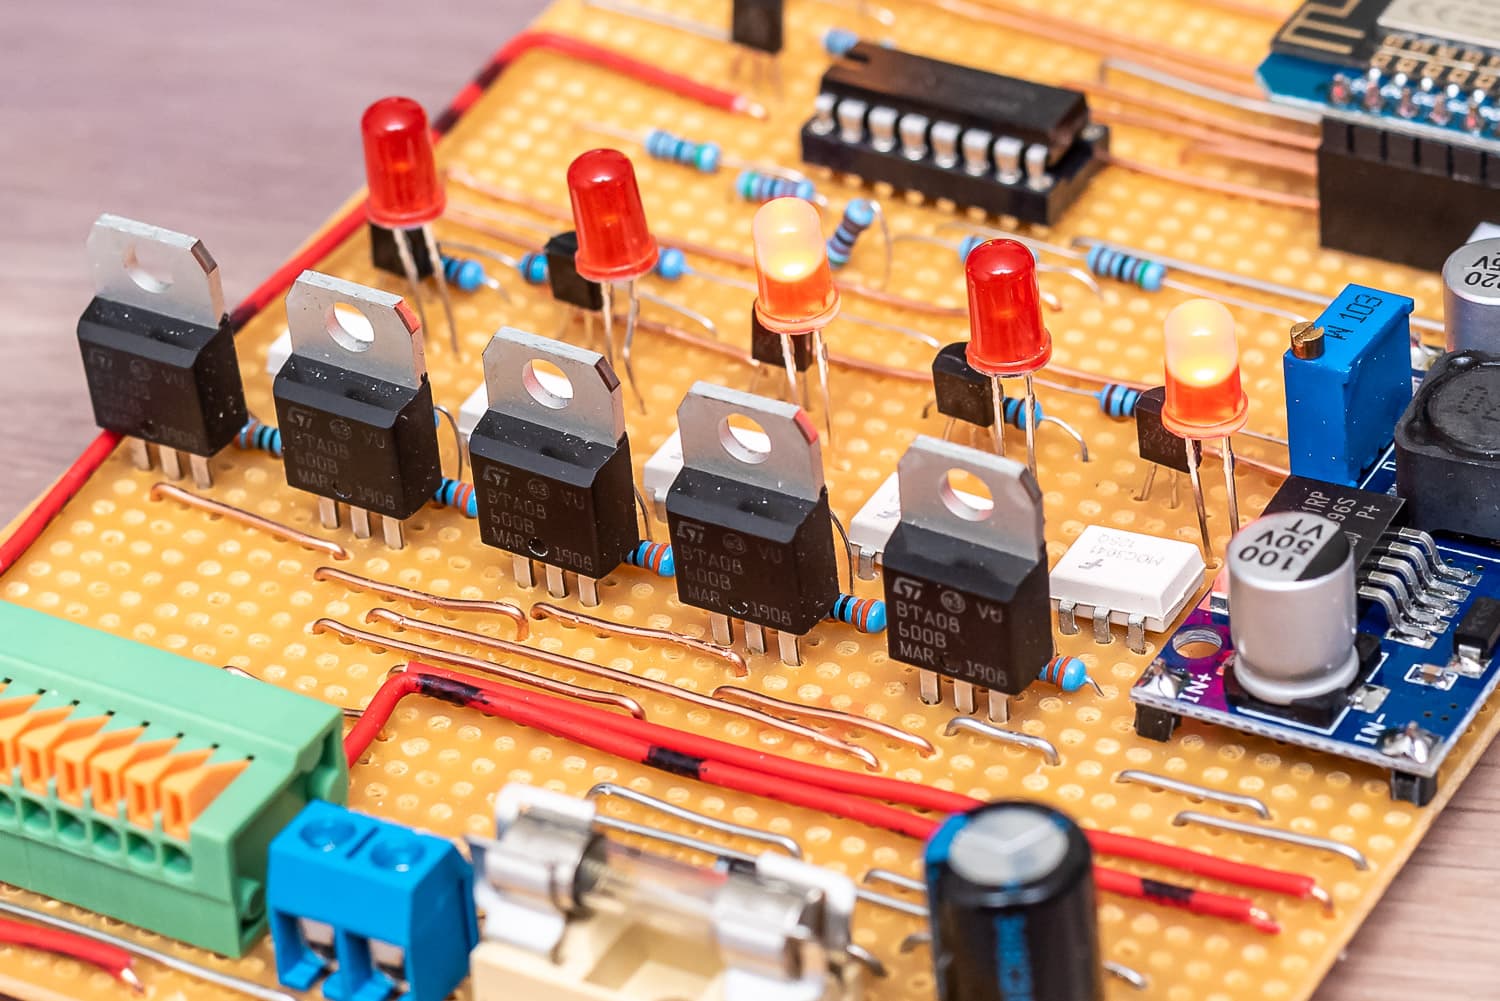
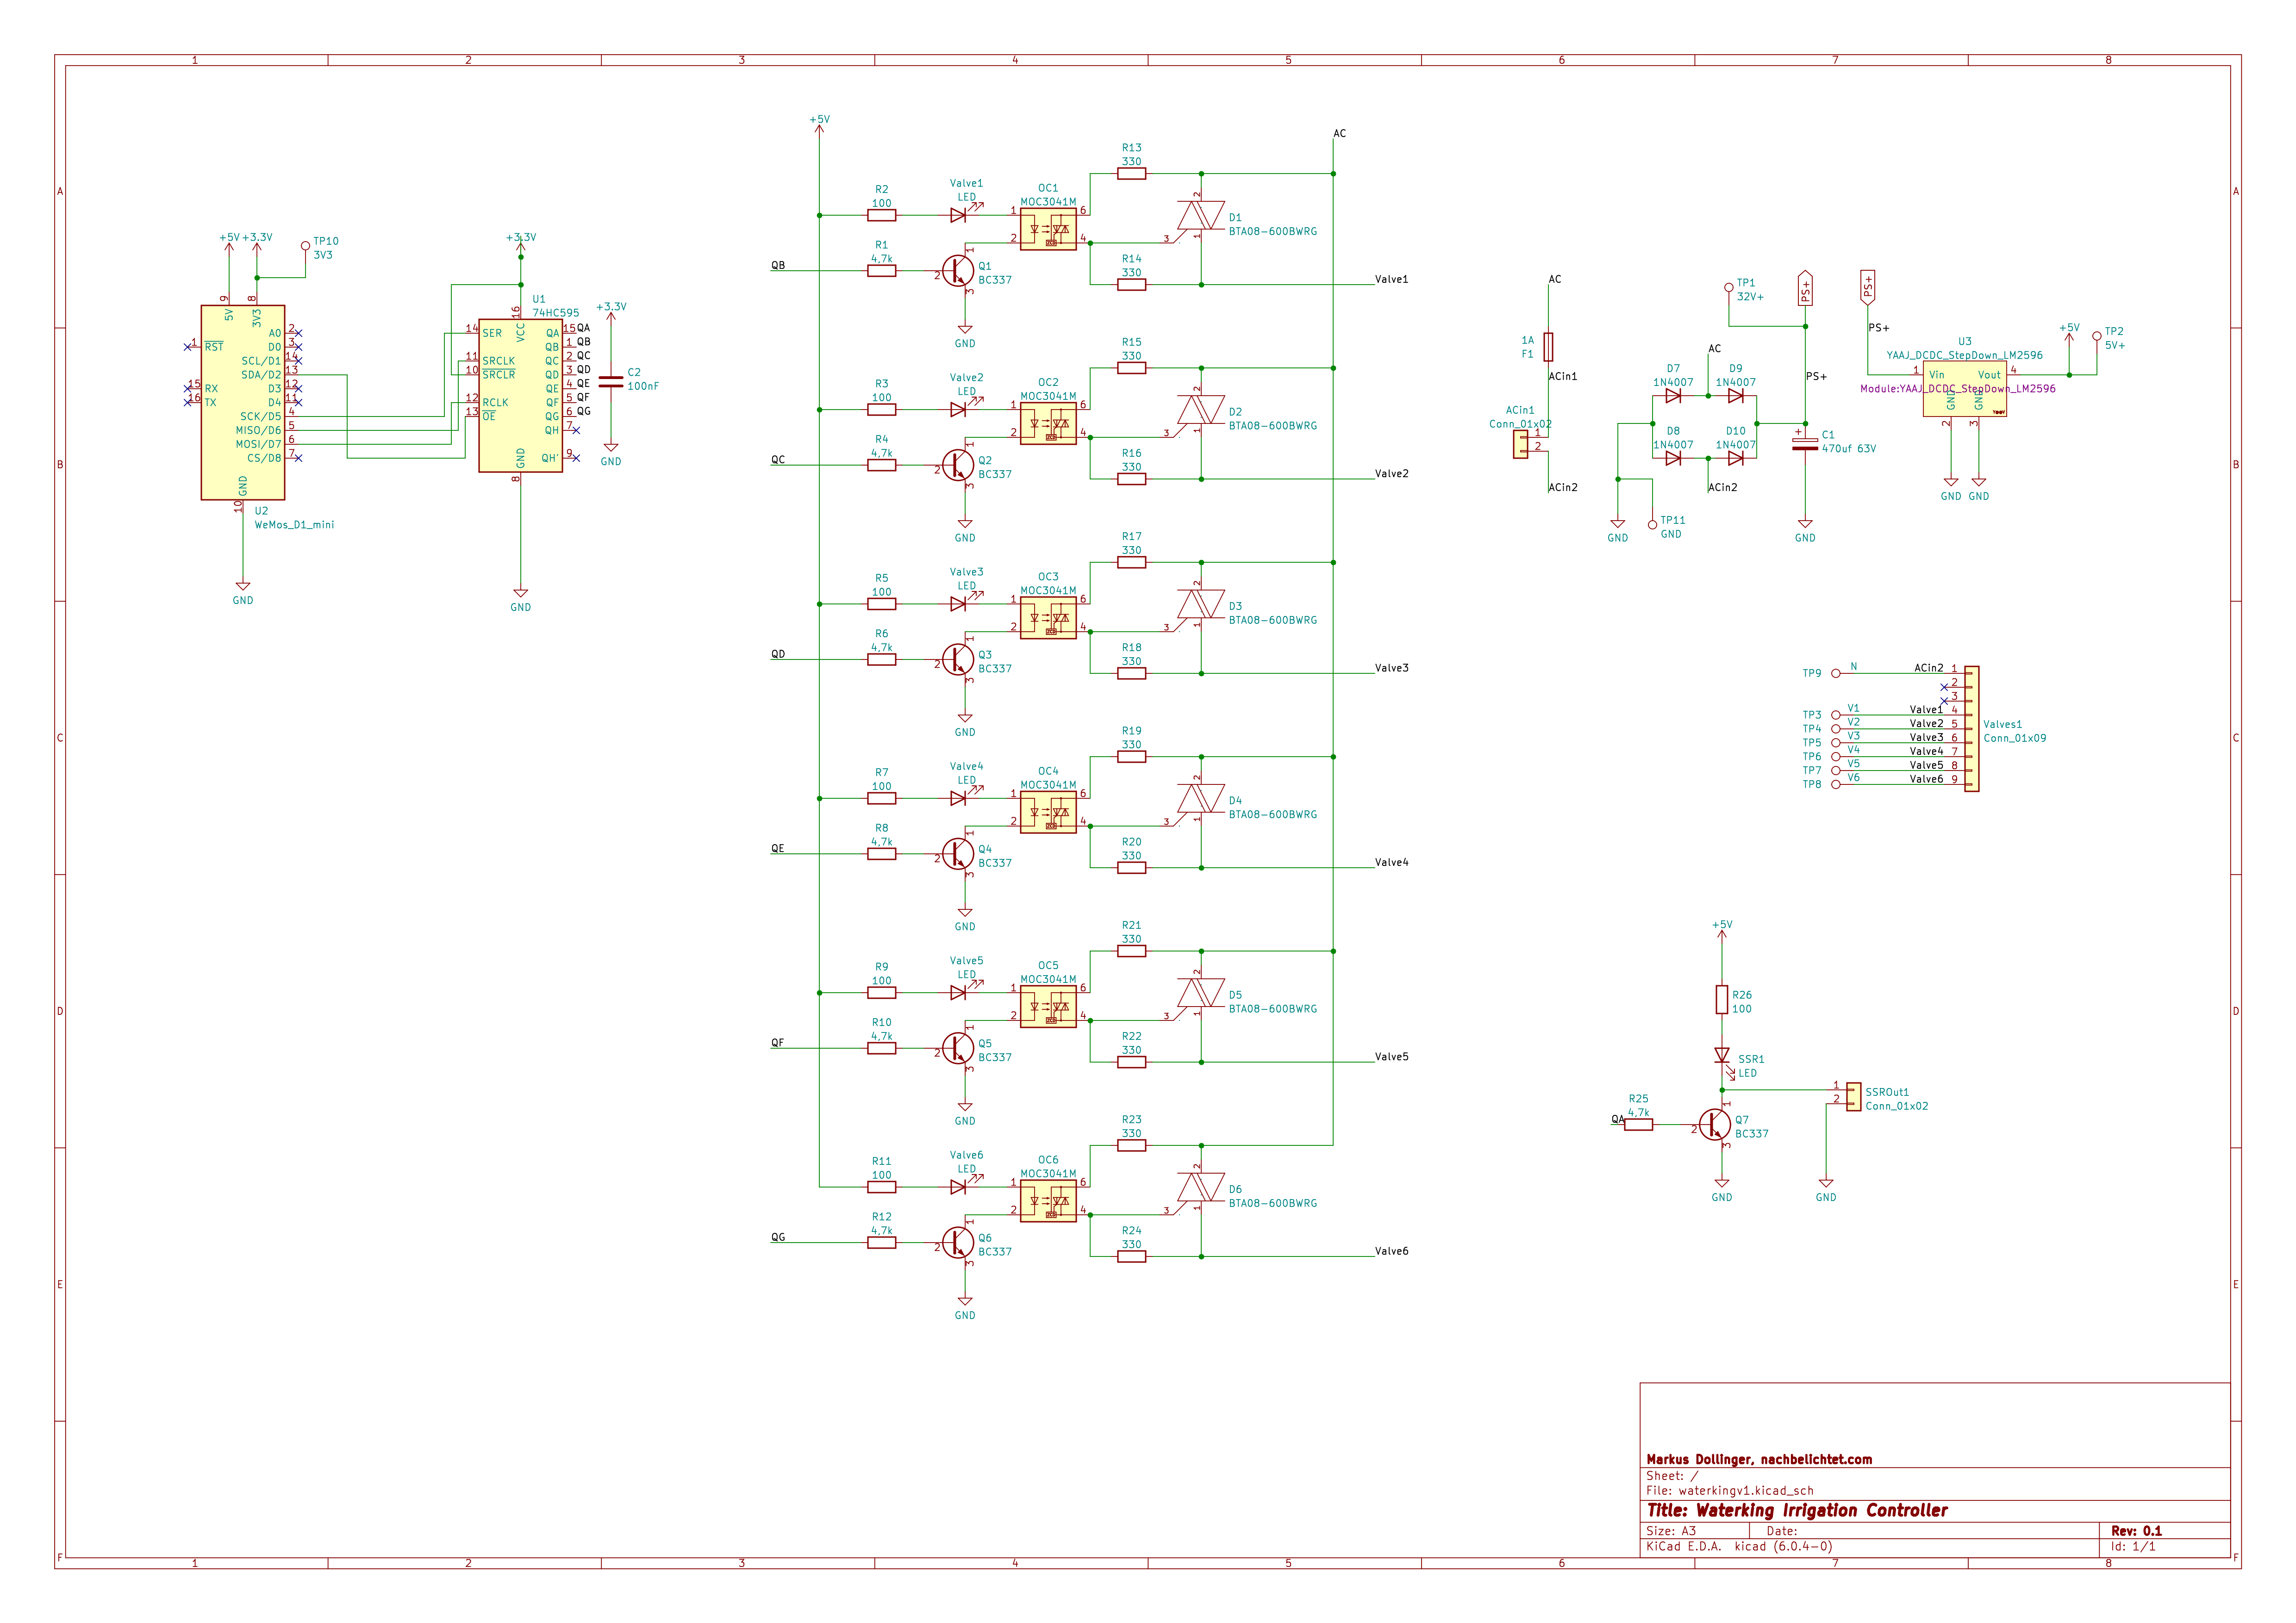
For my DIY controller, which I christened Waterking, I opted for BTA08-600B triacs, which are controlled via a MOC3041 optocoupler that also contains a zero-crossing triac driver. If you add 5 resistors, an NPN transistor and an LED, one channel costs less than one euro and you will never have contact problems. The LEDs indicate on the hardware side whether a valve is open and the optocoupler is activated.
As you already have the 24 volts, you can also use them to supply the ESP8266 and the display. Rectified, you get 35 V DC, which I convert very efficiently to 5 V using an LM2596S step-down converter.
As is often the case with my projects, a Wemos D1 Mini Pro is used because I bought a large quantity at a good price a long time ago. The Wemos is also utilised down to the (almost) last GPIO. I need 6 outputs to control 5 valves and our submersible pressure pump. Now you could use 6 GPIOs or use a shift register of type SN74HC595. This allows you to switch 8 outputs with 3 control pins. If you need more, you can cascade up to 4 SN74HC595 under ESPHome, for which you then need one more pin, but this gives you 32 outputs.
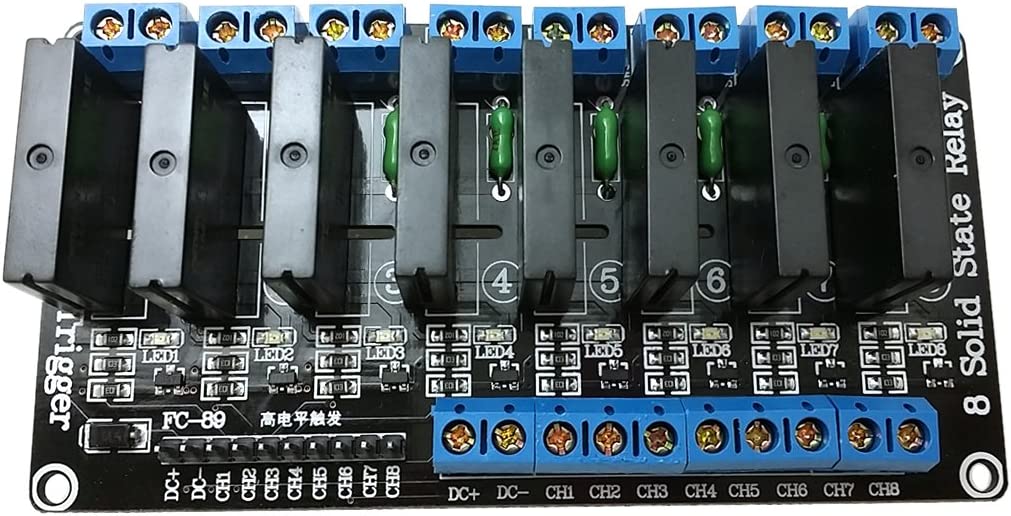
The pump is switched via a solid state relay (SSR).

- Mehrschichtiger wasserdichter Schutz IP68, 45-Grad-Schrägwinkel-Anti-Schock, abnehmbarer Anti-Blocking-Schutz.
- Eingangspegelgeber, hochpräzise Diffusion von Silizium, genauere Überwachung des Wasserstandes.
- Das gemessene Medium ist Wasser, Öl und andere Flüssigkeiten, die Edelstahl nicht angreifen.

- Max. Fördermenge 6500 l/h
- Max. Förderhöhe 30 m

- Es handelt sich hierbei um ein Step-UP, Spannungsregler Aufwärtswandler oder Boost-Converter.
- Die Ausgangsspannung ist nach dem Umwandlung immer größer als die Eingangsspannung.
- Die Platine wandelt Spannungen von 3V-32V, einstellbar an dem Potentiometer in 5V – 35V Volt um.

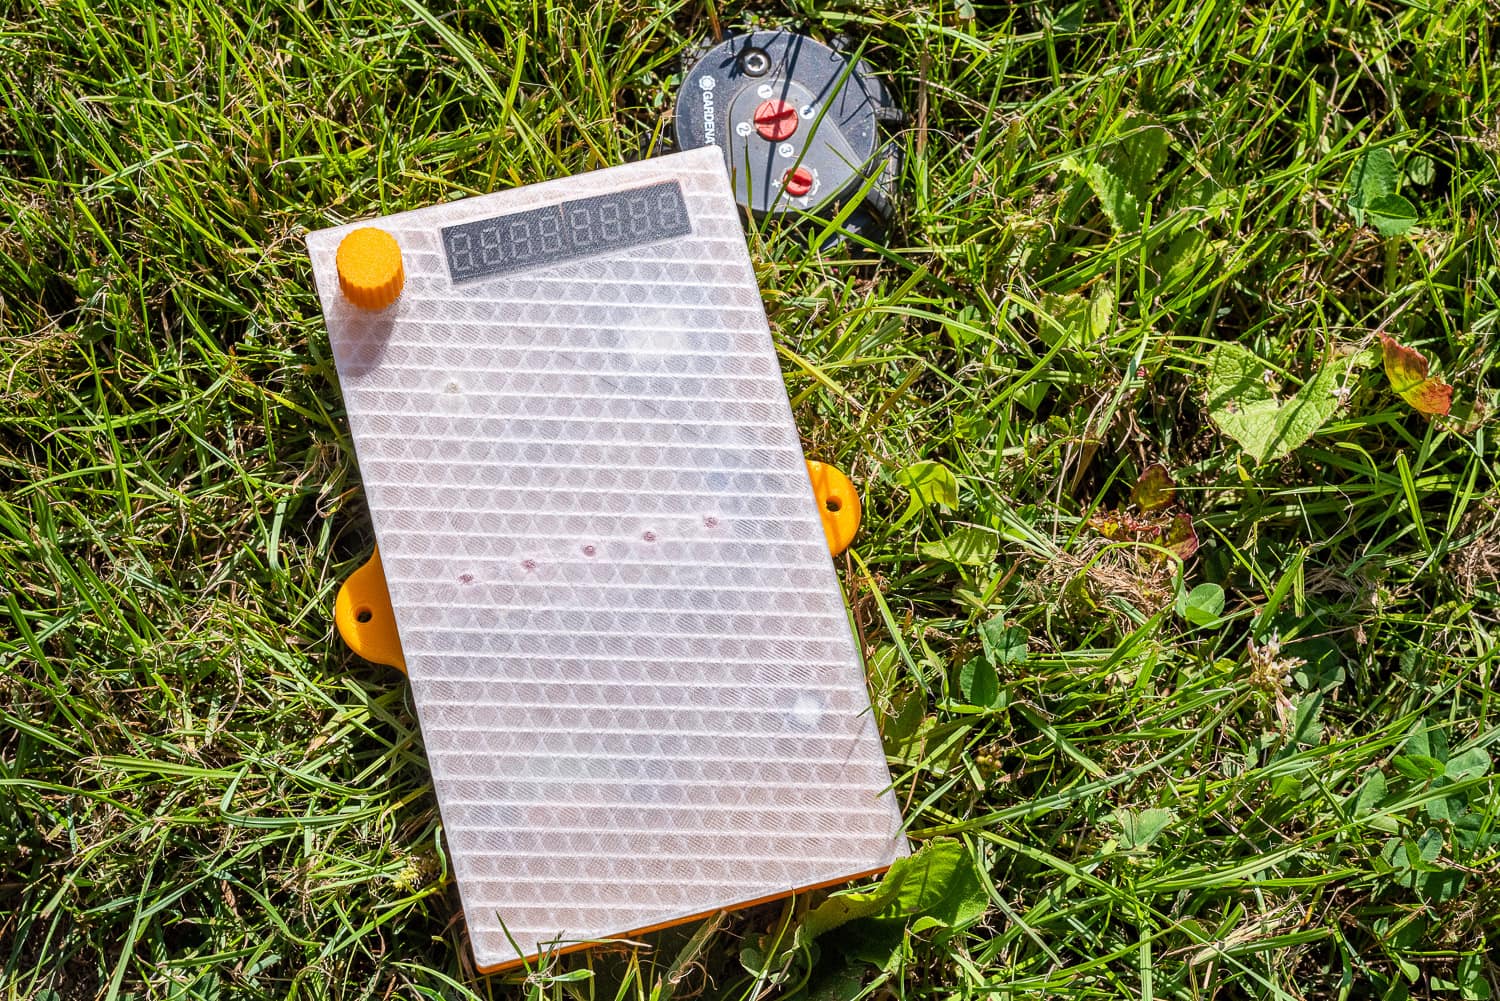
- batteriebetriebene füllstandanzeige
- misst füllstände von wassertanks wie regenwasser, klärkammern oder gülletanks
- anzeige erfolgt nach knopfdruck über 10 led’s

- BREITER AUSGANGSVOLATFE-BEREICH – Der Strom-Spannungs-Wandler hat einen weiten Versorgungsspannungsbereich und die Ausgangsspannung unterstützt mehrere Bereiche
- EINSTELLBAR – Der Strom-Spannungs-Wandler verwendet eine ausgeklügelte Produktionstechnologie, der 0-Punkt und der Vollbereich können selbst eingestellt werden
- KUNSTSTOFFMATERIAL – Das Konvertermodul besteht aus hochwertigem Kunststoff und hat eine hohe Stabilität, gute Linearität und Industriequalität
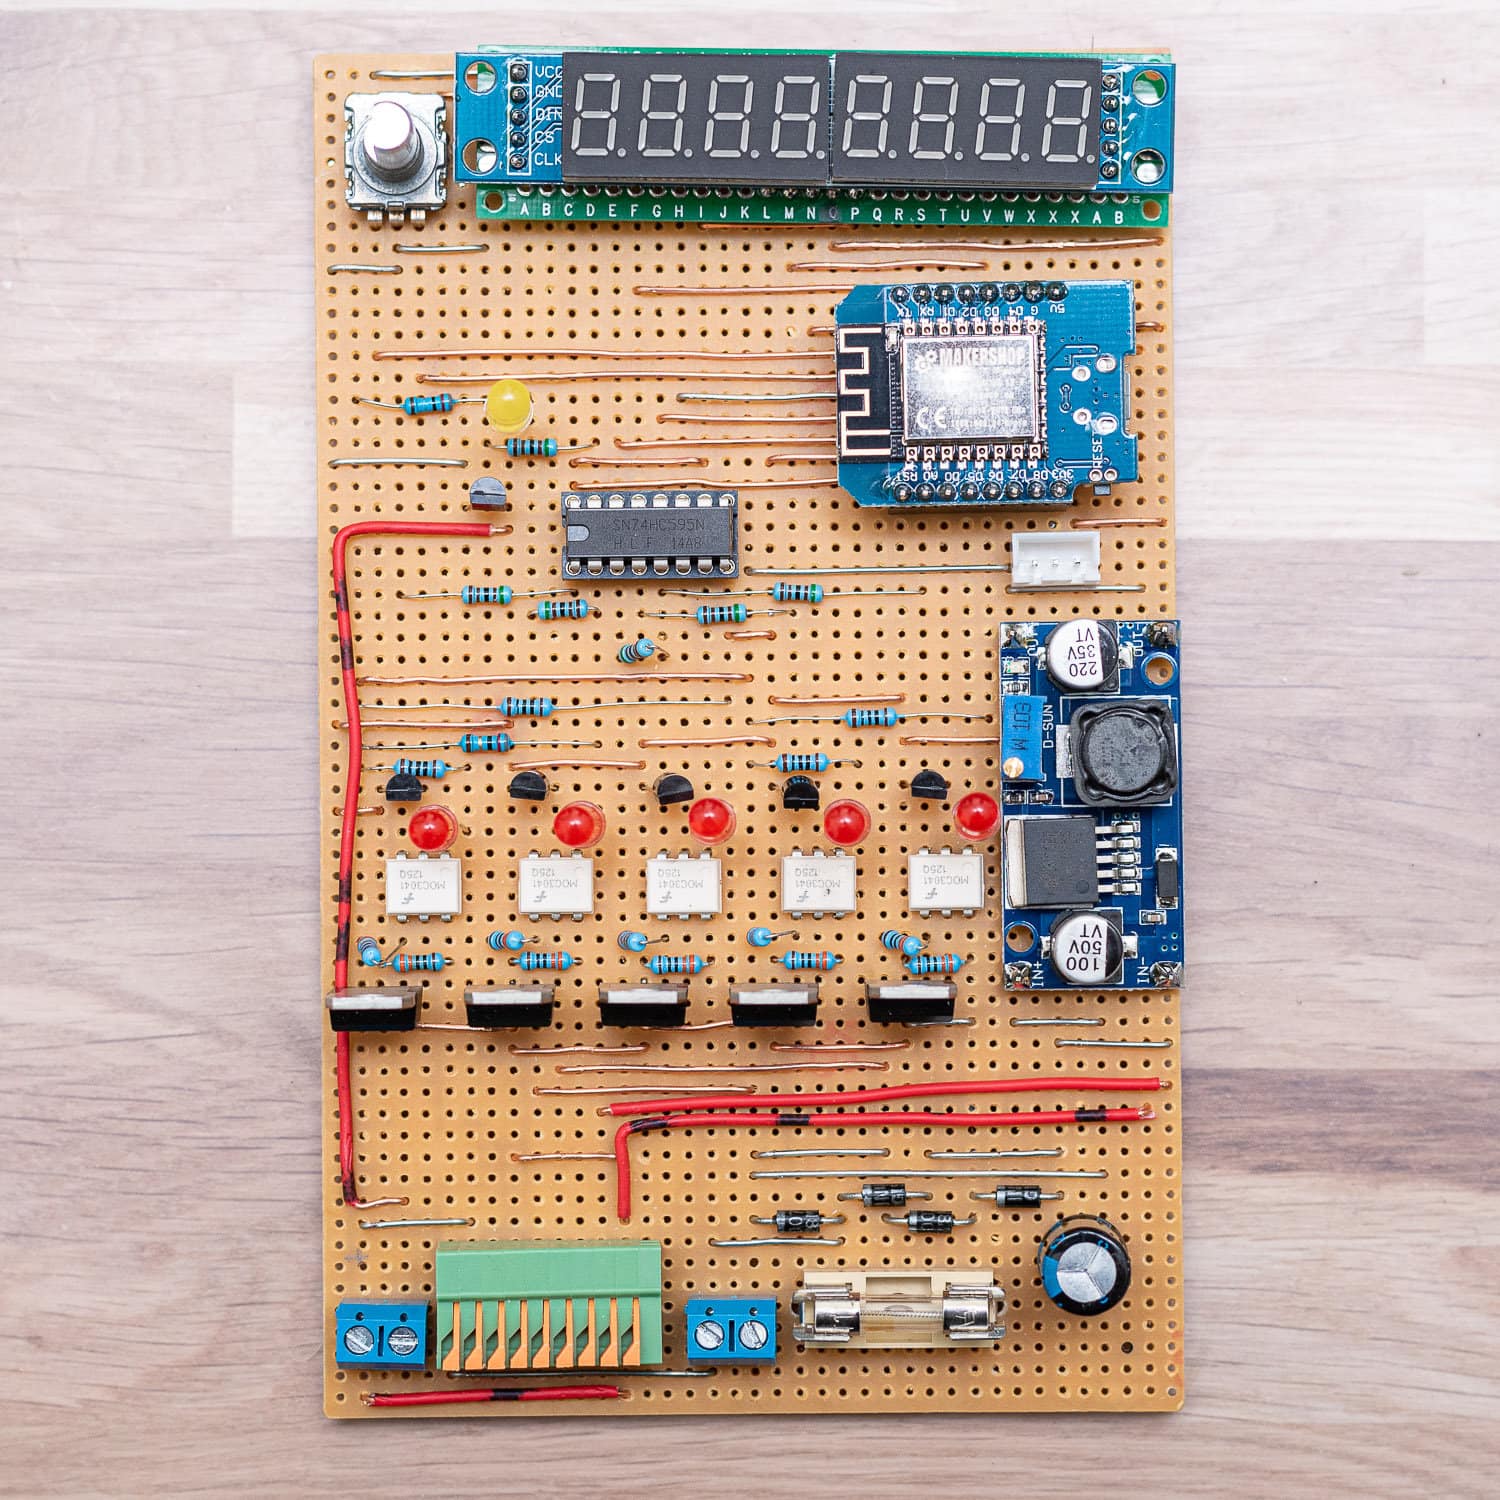
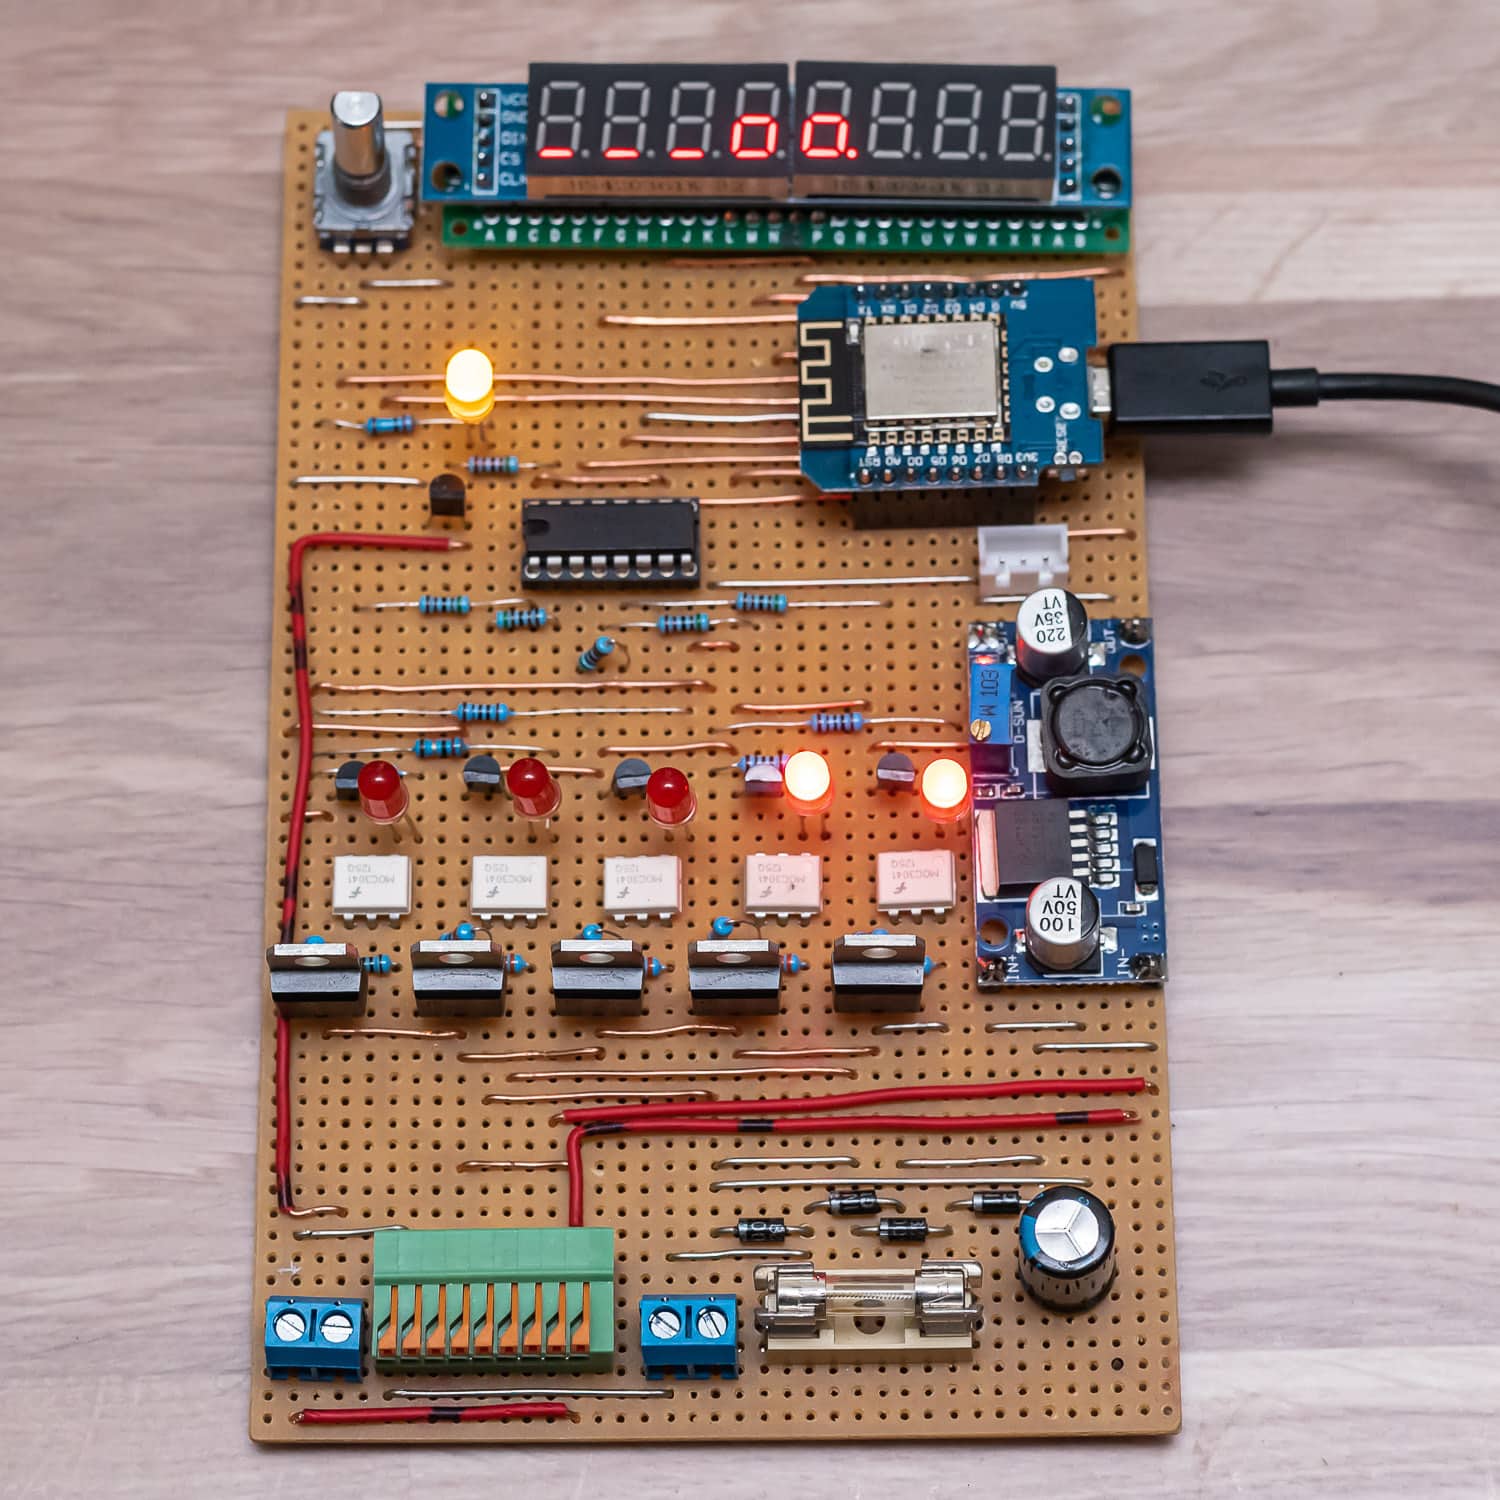
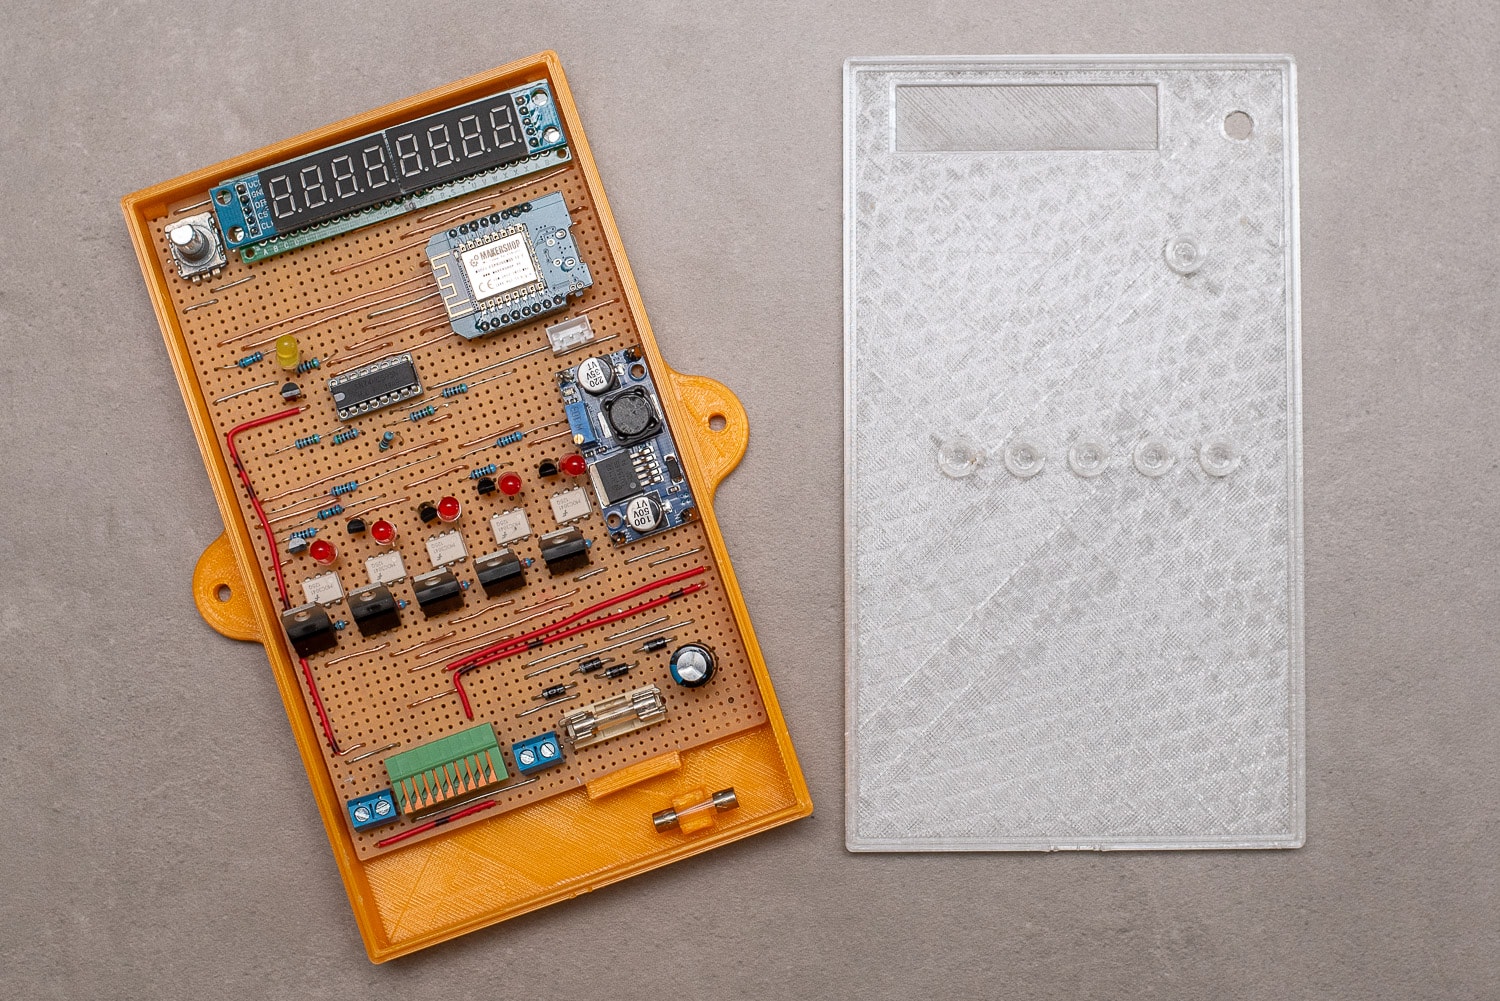
Originally, my controller was supposed to remain “dumb”, i.e. only make the triac outputs switchable via Home Assistant. But if you already have a microcontroller, you might as well add a few extra functions. For example, the valves switch off after a configurable time (10 minutes). If no valve is active, the pump is also deactivated. If the WLAN connection is lost during irrigation or Home Assistant has a bug, the valves and pump switch off automatically and autonomously. I built everything on a strip grid board. I’m “Team Strip Grid” – I just don’t like the messing around with solder on the perfboards.
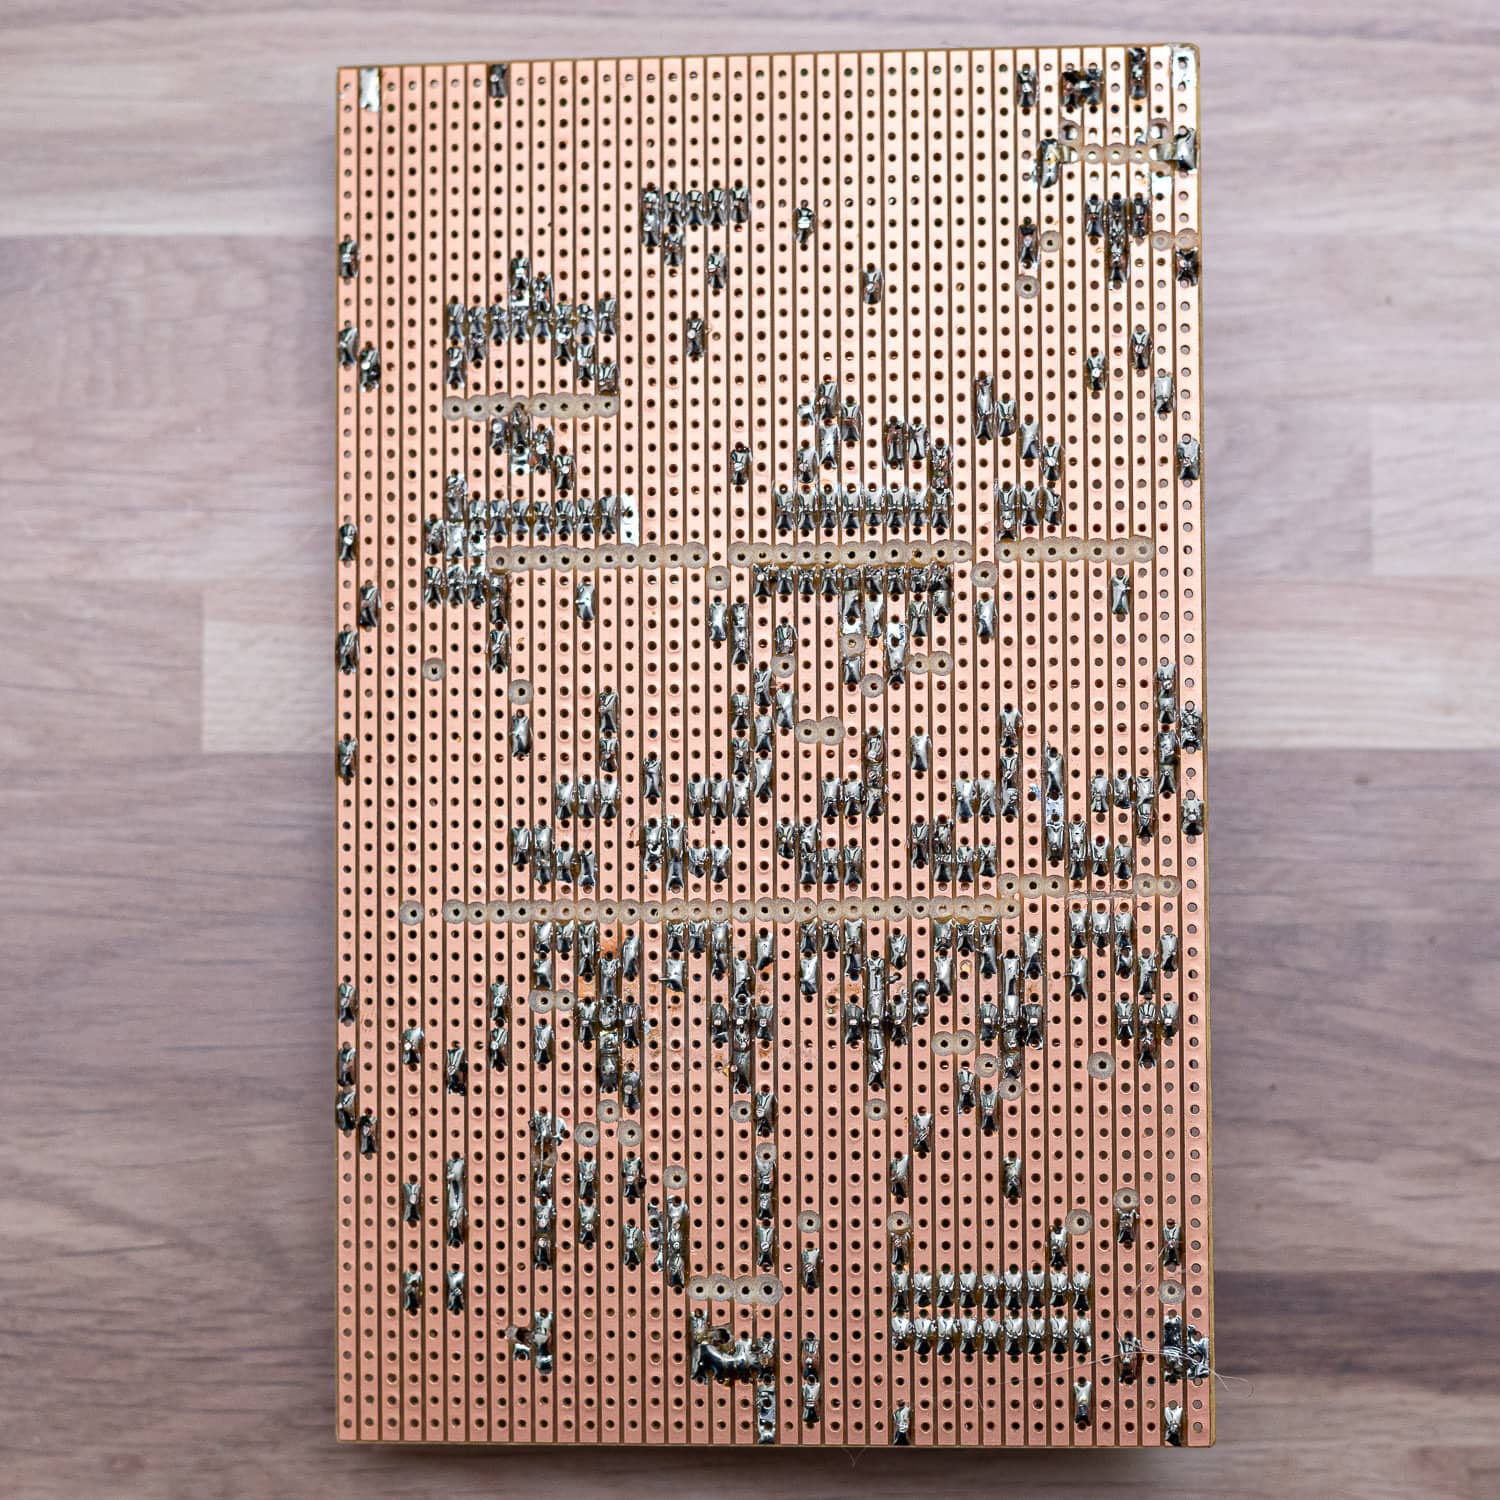
Please understand that I don’t have a plan for the layout of the board. I do things like this freely and without much pre-planning directly from the circuit diagram. Just test the position of the parts and off you go. Maybe I’ll add a circuit board layout with KiCAD when I get the chance – maybe one of you would like to do that too? The circuit diagram in KiCAD is available.
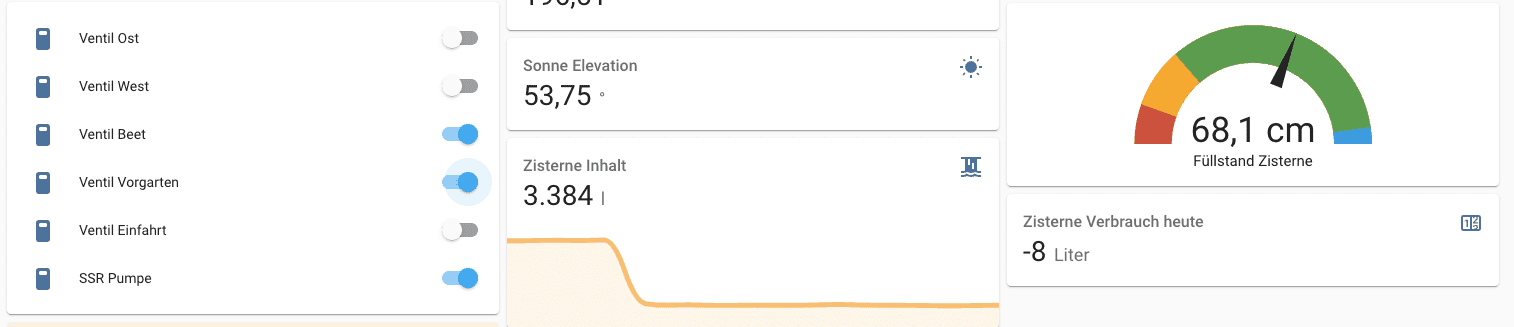
Using a rotary encoder and the LED display, I can not only display the status of the valves (in addition to the LEDs on the optocoupler), but also switch them on and off directly on the controller. Other menu levels show the water level of the cistern in centimetres and litres, the strength of the WLAN signal, today’s water consumption and the time. I have described how to build the water level meter with a TL-136 sensor here: https://staging.nachbelichtet.com/wasserstand-in-zisternen-mit-homeassistant-esphome-und-tl-136-drucksensor-messen/
You can change levels by simply turning the encoder. Pressing the button takes you to the setup menu for the valves. A dash indicates an inactive valve, a box an active one. The decimal point indicates which valve has just been selected and a long press on the button switches it on or off. A short press takes you back to the main menu.

I was once tempted to create a convenient menu with a simple 8-digit LED display. It doesn’t always have to be an OLED or LC display and the LED display is very robust, which is not unimportant at -20 to 50 °C in the shed.

By checking the water level in the cistern, I can deactivate the pump if the water level drops below 12 cm. A long press on the encoder button switches off all valves and the pump immediately.
Interlocking the outputs prevents certain valves from being active at the same time. This not only prevents a drop in pressure, but also prevents the power pack from being overloaded. A maximum of 3 valves(Gardena Micro Trip dripper raised bed, front garden and water withdrawal) can be active and only one of the two circuits for the lawn area. The controller also provides this safety function directly – regardless of what else I would configure in Home Assistant.
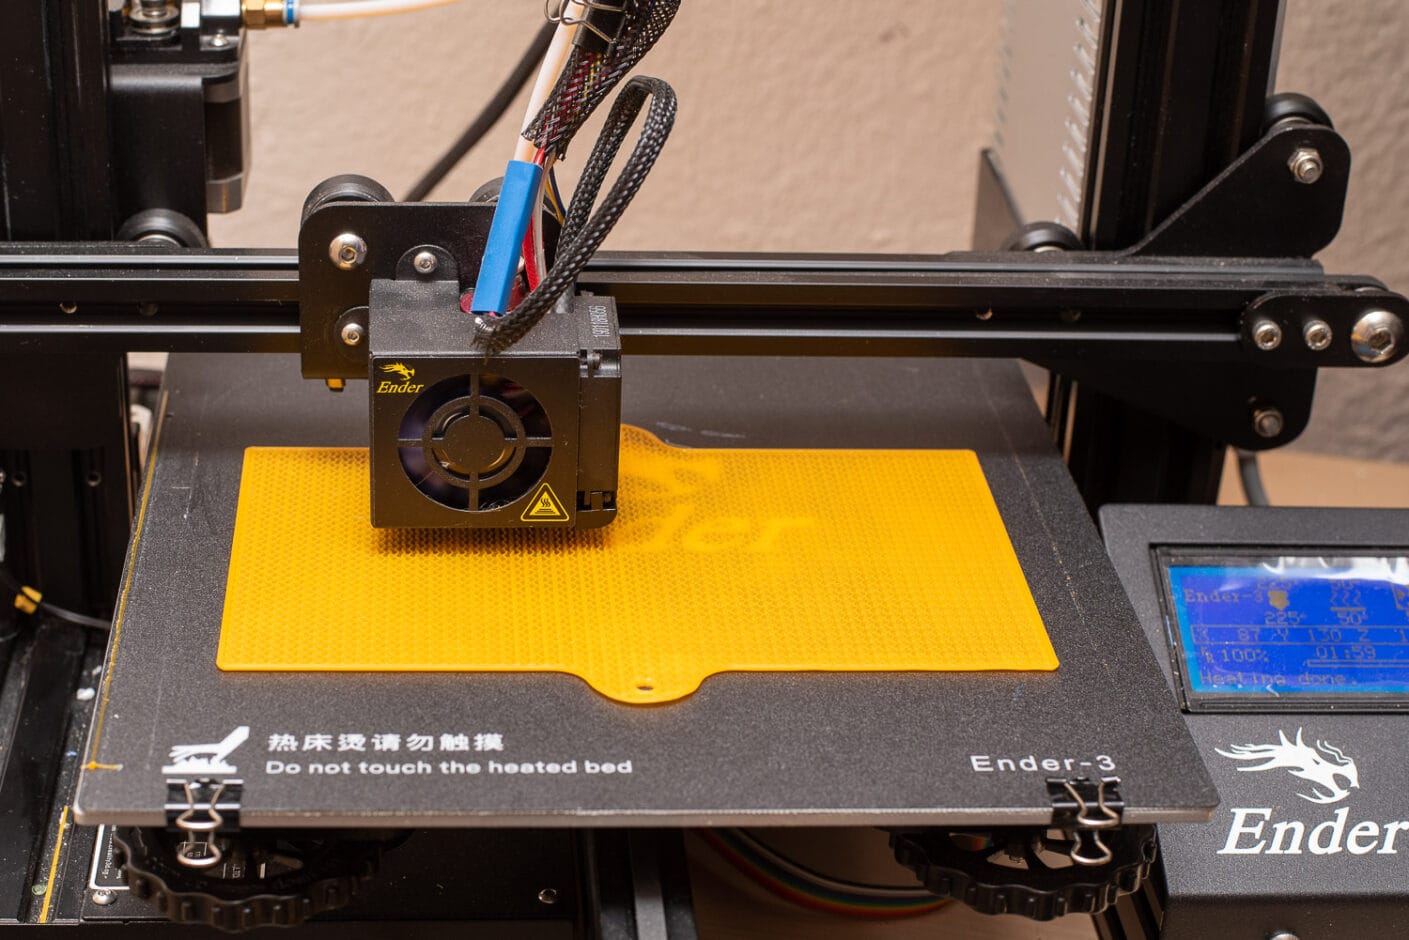
To ensure that everything is properly packaged and looks good, I printed a housing from PETG and PLA. The transparent PETG allows the LEDs and the display to shine through.
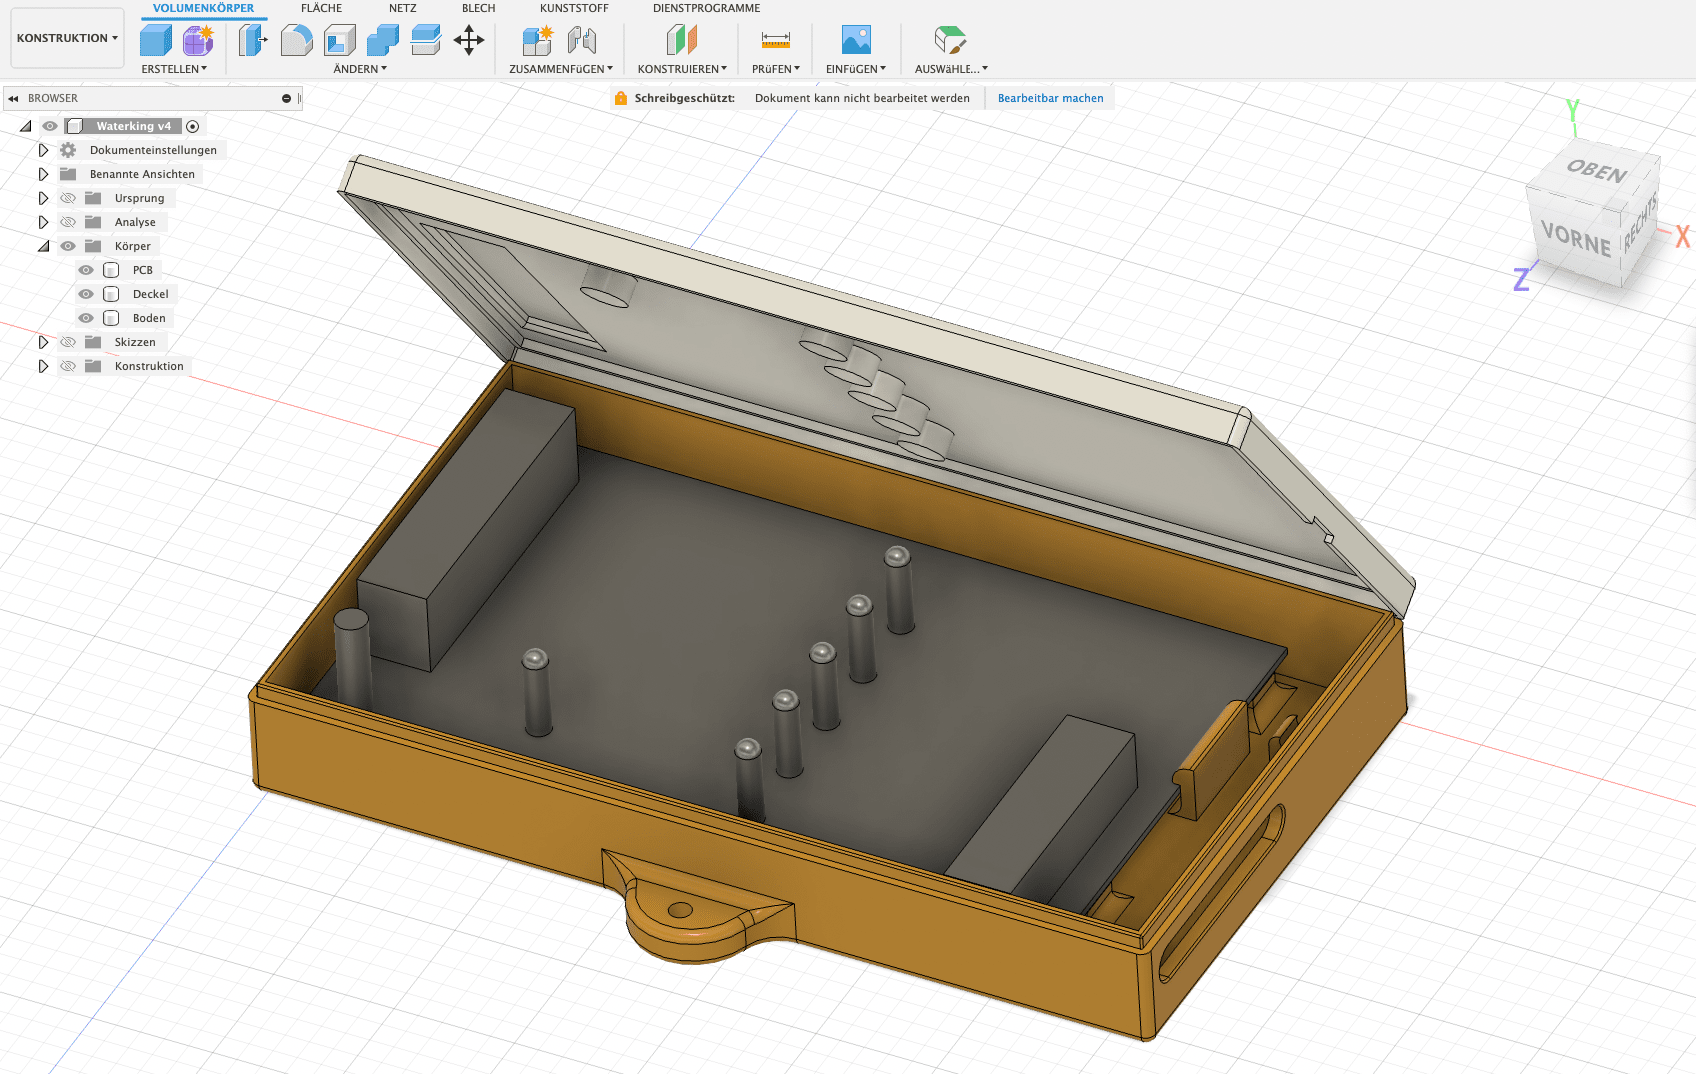
For the display cut-out, I chose the layer thickness during construction so that no infill is printed. This makes it look like a transparent film.
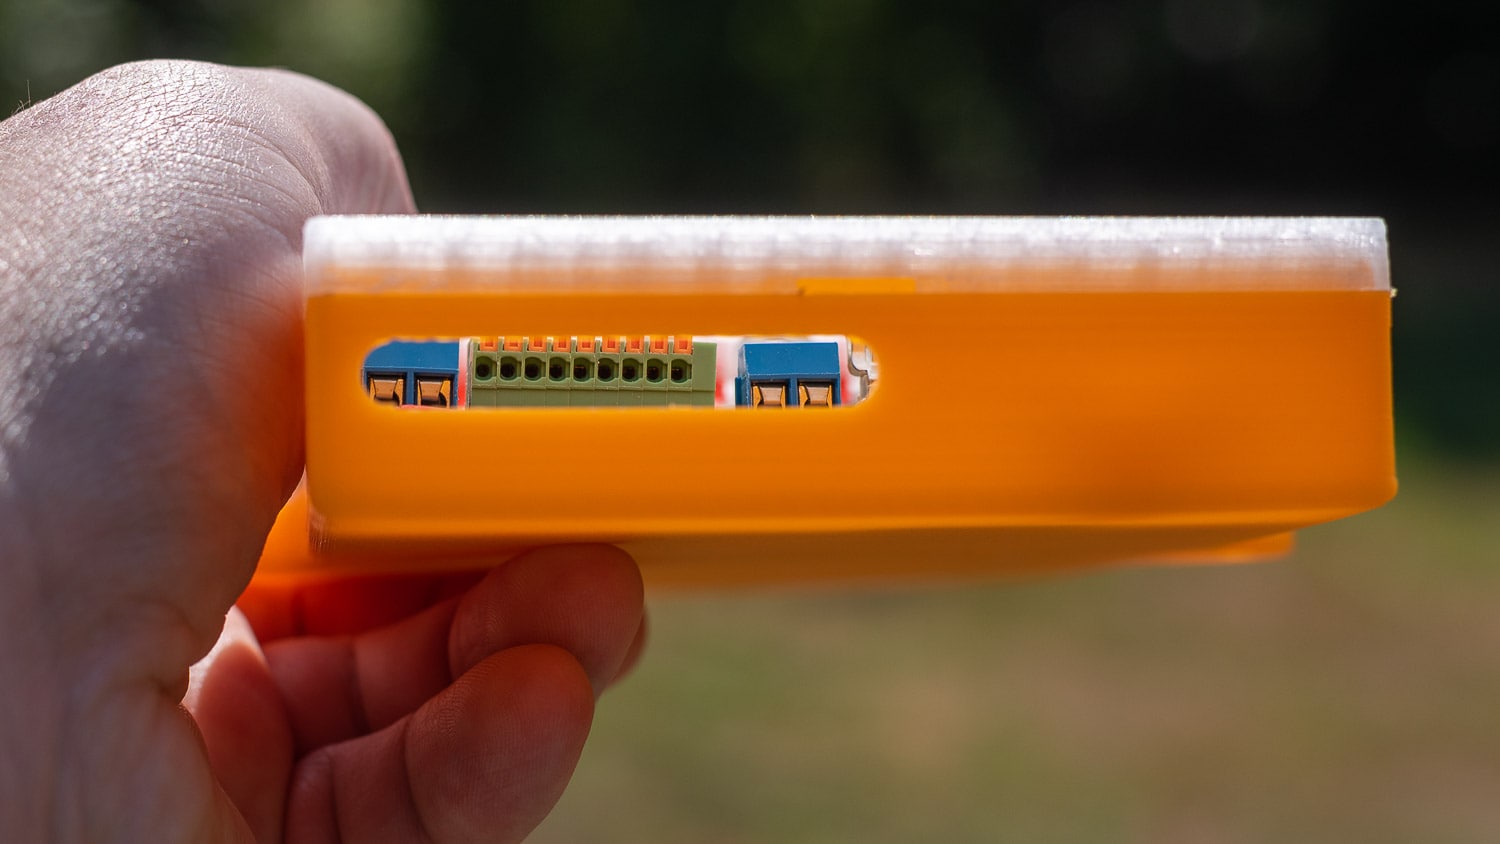
The entire housing can be closed without screws and the circuit board is also only held in place by snap fasteners. With a handmade circuit board, the construction of a housing with a lid is not entirely trivial, but it worked on the first attempt and print.
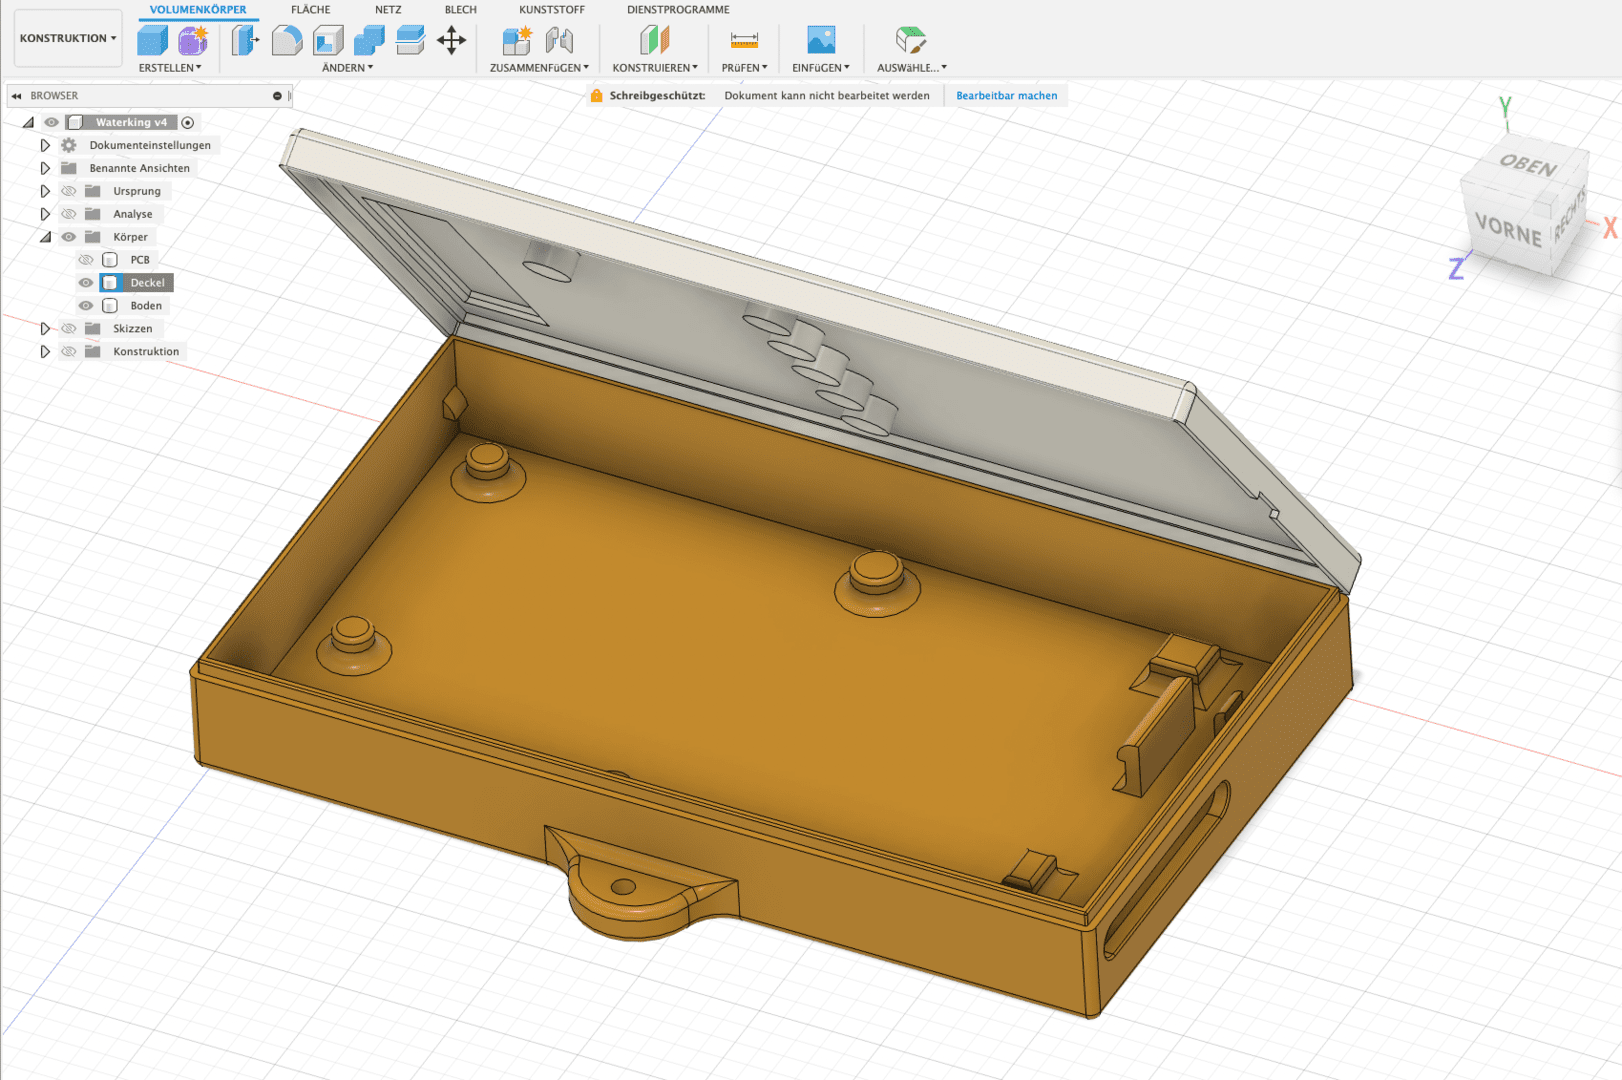
A holder for a spare fuse is also included as a gag. Access to the connection terminals is from below. As always, I used Autodesk Fusion 360 for the design. My Creality Ender 3 did the printing in about 10 hours.
If you don’t want to go to the trouble of controlling the valves, you can also use an SSR board instead of the triacs, which you can get for less than €20. Here you only have to control the channels with the ESP. The code below can also be used for this.
I have annotated the YAML configuration in ESPHome accordingly:
esphome:
  name: waterking
  platform: ESP8266
  board: d1_mini
  # Switch off all outputs at startup for safety reasons
  on_boot:
    then:
      - switch.turn_off: v1
      - switch.turn_off: v2
      - switch.turn_off: v3
      - switch.turn_off: v4
      - switch.turn_off: v5
      - switch.turn_off: pump
      - sensor.rotary_encoder.set_value:
          id: enc
          value: 0

# Switch off serial logger on RX/TX to be able to use pins for other tasks
logger:
  baud_rate: 0

# Activate Home Assistant API
api:

ota:
  password: !secret otapass"

wifi:
  ssid: !secret wifi_ssid
  password: !secret wifi_password
  use_address: waterking.local

  # Fallback hotspot
  ap:
    ssid: "Bewaesserung Fallback Hotspot"
    password: !secret hotspot

captive_portal:

# Get time from HA
time:
  - platform: homeassistant
    id: homeassistant_time

# Set global variables
globals:
  - id: setpage #Setting mode
    type: bool
    restore_value: no
    initial_value: 'false'

  - id: maxtime #maximum valve runtime as protection
    type: int
    restore_value: yes
    initial_value: '600000' # in ms = 10 min

# Set up shift register
sn74hc595:
  - id: 'sn74hc595_hub'
    data_pin: D5
    clock_pin: D6
    latch_pin: D7
    oe_pin: D2
    sr_count: 1

# SPI for display
spi:
  clk_pin: D0
  mosi_pin: D1

# Define valves

switch:
  - platform: gpio
    name: "Valve East"
    id: v1
    pin:
      sn74hc595: sn74hc595_hub
      number: 1
      inverted: false
    interlock: [v2,v4,v5] # Do not switch on certain valves at the same time -> pressure loss
    on_turn_on:
      - switch.turn_on: pump
      - delay: !lambda "return id(maxtime);"
      - switch.turn_off: v1

  - platform: gpio
    name: "Valve West"
    id: v2
    pin:
      sn74hc595: sn74hc595_hub
      number: 2
      inverted: false
    interlock: [v1,v4,v5]
    on_turn_on:
      - switch.turn_on: pump
      - delay: !lambda "return id(maxtime);"
      - switch.turn_off: v2

  - platform: gpio
    name: "Ventil Beet"
    id: v3
    pin:
      sn74hc595: sn74hc595_hub
      number: 3
      inverted: false
    interlock: [v2]
    on_turn_on:
      - switch.turn_on: pump
      - delay: !lambda "return id(maxtime);"
      - switch.turn_off: v3

  - platform: gpio
    name: "Front garden valve"
    id: v4
    pin:
      sn74hc595: sn74hc595_hub
      number: 4
      inverted: false
    interlock: [v1,v2]
    on_turn_on:
      - switch.turn_on: pump
      - delay: !lambda "return id(maxtime);"
      - switch.turn_off: v4

  - platform: gpio
    name: "Valve inlet"
    id: v5
    pin:
      sn74hc595: sn74hc595_hub
      number: 5
      inverted: false
    interlock: [v2,v5]
    on_turn_on:
      - switch.turn_on: pump
      - delay: 1h #Valve 5 may be on for max. 1 hour -> water withdrawal
      - switch.turn_off: v5

# Solid state relay output for pump control
  - platform: gpio
    name: "SSR pump"
    internal: true # Do not display pump in HA
    id: pump
    pin:
      sn74hc595: sn74hc595_hub
      number: 0
      inverted: false

# Set up display
display:
  - platform: max7219
    cs_pin: D3
    num_chips: 1
    update_interval: 500ms
    lambda: |-
      // Display page 5 time
      if ((id(enc).state == 5) && (id(setpage) == false)) {
        it.print(" ");
        it.strftime("%H.%M.%S", id(homeassistant_time).now());
      }

      // Page 4 Wifi Level
      if ((id(enc).state == 4) && (id(setpage) == false)) {
        it.print(" ");
        it.printf("Wi %.0fdB", id(wlan_signal).state);
      }

      // Page 1 Water level Height
      if ((id(enc).state == 1) && (id(setpage) == false)) {
        it.print(" ");
        it.printf("FH %.1fcn", id(cistern_cm).state);
          }

      // Page 2 Water level litres
      if ((id(enc).state == 2) && (id(setpage) == false)) {
        it.print(" ");
        it.printf("FS %.0fL", id(cistern_litre).state);
          }

      // Page 3 Water consumption today
      if ((id(enc).state == 3) && (id(setpage) == false)) {
        it.print(" ");
        it.printf(1,"= %.0f L", id(cistern_delta_today).state);

          }

      // Display page 0 status valves
      if ((id(enc).state == 0) && (id(setpage) == false)) {
        it.print(" ");
          if ((id(v1).state)) {
            it.print("o");
            } else {
            it.print("_");
              }

          if ((id(v2).state)) {
            it.print(1, "o");
            } else {
            it.print(1,"_");
              }

          if ((id(v3).state)) {
            it.print(2, "o");
            } else {
            it.print(2,"_");
              }

          if ((id(v4).state)) {
            it.print(3, "o");
            } else {
            it.print(3,"_");
              }

          if ((id(v5).state)) {
            it.print(4, "o");
            } else {
            it.print(4,"_");
              }
          if ((id(pump).state)) {
            it.print(6, "P");
            } else {
            it.print(6,"_");
              }
          }

      // First page setup page
      if (id(setpage) == true && id(enc).state == 0) {
        it.print(" S");
        if ((id(v1).state)) {
          it.print("o");
          } else {
          it.print("_");
            }

        if ((id(v2).state)) {
          it.print(1, "o");
          } else {
          it.print(1,"_");
            }

        if ((id(v3).state)) {
          it.print(2, "o");
          } else {
          it.print(2,"_");
            }

        if ((id(v4).state)) {
          it.print(3, "o");
          } else {
          it.print(3,"_");
            }

        if ((id(v5).state)) {
          it.print(4, "o");
          } else {
          it.print(4,"_");
            }
        if ((id(pump).state)) {
          it.print(6, "P");
          } else {
          it.print(6,"_");
            }

      }


      // Set valve 1

      if (id(setpage) == true && id(enc).state == 1) {


        if ((id(v1).state)) {
          it.print("o.");
          } else {
          it.print("_.");
            }

        if ((id(v2).state)) {
          it.print(1, "o");
          } else {
          it.print(1,"_");
            }

        if ((id(v3).state)) {
          it.print(2, "o");
          } else {
          it.print(2,"_");
            }

        if ((id(v4).state)) {
          it.print(3, "o");
          } else {
          it.print(3,"_");
            }

        if ((id(v5).state)) {
          it.print(4, "o");
          } else {
          it.print(4,"_");
            }

          } // End V1

        // Set valve 2

        if (id(setpage) == true && id(enc).state == 2) {


          if ((id(v1).state)) {
            it.print("o");
            } else {
            it.print("_");
              }

          if ((id(v2).state)) {
            it.print(1, "o.");
            } else {
            it.print(1,"_.");
              }

          if ((id(v3).state)) {
            it.print(2, "o");
            } else {
            it.print(2,"_");
              }

          if ((id(v4).state)) {
            it.print(3, "o");
            } else {
            it.print(3,"_");
              }

          if ((id(v5).state)) {
            it.print(4, "o");
            } else {
            it.print(4,"_");
              }

          }

          if (id(setpage) == true && id(enc).state == 3) {


            if ((id(v1).state)) {
              it.print("o");
              } else {
              it.print("_");
                }

            if ((id(v2).state)) {
              it.print(1, "o");
              } else {
              it.print(1,"_");
                }

            if ((id(v3).state)) {
              it.print(2, "o.");
              } else {
              it.print(2,"_.");
                }

            if ((id(v4).state)) {
              it.print(3, "o");
              } else {
              it.print(3,"_");
                }

            if ((id(v5).state)) {
              it.print(4, "o");
              } else {
              it.print(4,"_");
                }

            }

            if (id(setpage) == true && id(enc).state == 4) {


              if ((id(v1).state)) {
                it.print("o");
                } else {
                it.print("_");
                  }

              if ((id(v2).state)) {
                it.print(1, "o");
                } else {
                it.print(1,"_");
                  }

              if ((id(v3).state)) {
                it.print(2, "o");
                } else {
                it.print(2,"_");
                  }

              if ((id(v4).state)) {
                it.print(3, "o.");
                } else {
                it.print(3,"_.");
                  }

              if ((id(v5).state)) {
                it.print(4, "o");
                } else {
                it.print(4,"_");
                  }

              }
              if (id(setpage) == true && id(enc).state == 5) {


                if ((id(v1).state)) {
                  it.print("o");
                  } else {
                  it.print("_");
                    }

                if ((id(v2).state)) {
                  it.print(1, "o");
                  } else {
                  it.print(1,"_");
                    }

                if ((id(v3).state)) {
                  it.print(2, "o");
                  } else {
                  it.print(2,"_");
                    }

                if ((id(v4).state)) {
                  it.print(3, "o");
                  } else {
                  it.print(3,"_");
                    }

                if ((id(v5).state)) {
                  it.print(4, "o.");
                  } else {
                  it.print(4,"_.");
                    }

                }

sensor:

  - platform: rotary_encoder # Set up rotary encoder
    name: "Rotary Encoder"
    id: enc
    publish_initial_value: true
    pin_a:
      number: TX
      inverted: true
      mode:
        input: true
        pullup: true
    pin_b:
      number: RX
      inverted: true
      mode:
        input: true
        pullup: true
    max_value: 5
    min_value: 0

# Get fill level in litres from HA
  - platform: homeassistant
    id: cistern_litre
    entity_id: sensor.cistern_litre

# Get consumption today from HA
  - platform: homeassistant
    id: cistern_delta_today
    entity_id: sensor.cistern_delta_today

# Get fill level in cm from HA
  - platform: homeassistant
    id: cistern_cm
    entity_id: sensor.wasserstandraw # Emergency shutdown water level < 12 cm -> pump protection
    on_value_range:
      - below: 12
        then:
          - switch.turn_off: v1
          - switch.turn_off: v2
          - switch.turn_off: v3
          - switch.turn_off: v4
          - switch.turn_off: v5
          - switch.turn_off: pump

# Get WLAN signal strength ... because you can
  - platform: wifi_signal
    name: "ESP Wifi Signal"
    update_interval: 30s
    id: wlan_signal

binary_sensor:

  - platform: template
    name: "Any Valve On" # If all valves are off, switch off the pump
    internal: true
    lambda: 'return id(v1).state or id(v2).state or id(v3).state or id(v4).state or id(v5).state ;'
    on_release:
      then:
        - switch.turn_off: pump

  - platform: gpio # Set up buttons on the encoder
    id: encswitch
    pin:
      number: GPIO2
      mode: INPUT_PULLUP
      inverted: True
    on_click:
    - min_length: 50ms # Short actuation to enter the valve setup
      max_length: 250ms
      then:
        - lambda: |-
            if(id(setpage)) {
              id(setpage) = false;
            } else {
              id(setpage) = true;
            }

    - min_length: 600ms # long actuation to switch selected valve on/off
      max_length: 1500ms
      then:
        - if:
            condition:
              lambda: 'return (id(setpage) == true && id(enc).state == 1);'
            then:
              switch.toggle: v1

        - if:
            condition:
              lambda: 'return (id(setpage) == true && id(enc).state == 2);'
            then:
              switch.toggle: v2

        - if:
            condition:
              lambda: 'return (id(setpage) == true && id(enc).state == 3);'
            then:
              switch.toggle: v3

        - if:
            condition:
              lambda: 'return (id(setpage) == true && id(enc).state == 4);'
            then:
              switch.toggle: v4

        - if:
            condition:
              lambda: 'return (id(setpage) == true && id(enc).state == 5);'
            then:
              switch.toggle: v5


    - min_length: 3000ms # very long actuation to switch off all valves and the pump
      max_length: 60000ms
      then:
        - switch.turn_off: v1
        - switch.turn_off: v2
        - switch.turn_off: v3
        - switch.turn_off: v4
        - switch.turn_off: v5
        - switch.turn_off: pump

Code language: YAML (yaml)
Irrigation control with Home Assistant
Home Assistant will take over the actual irrigation control. As various sensors such as the rain sensor of the LCN-WIH weather station, rain quantity sensor and the weather forecast are already available as entities in HA, these can be used for optimal and economical irrigation.

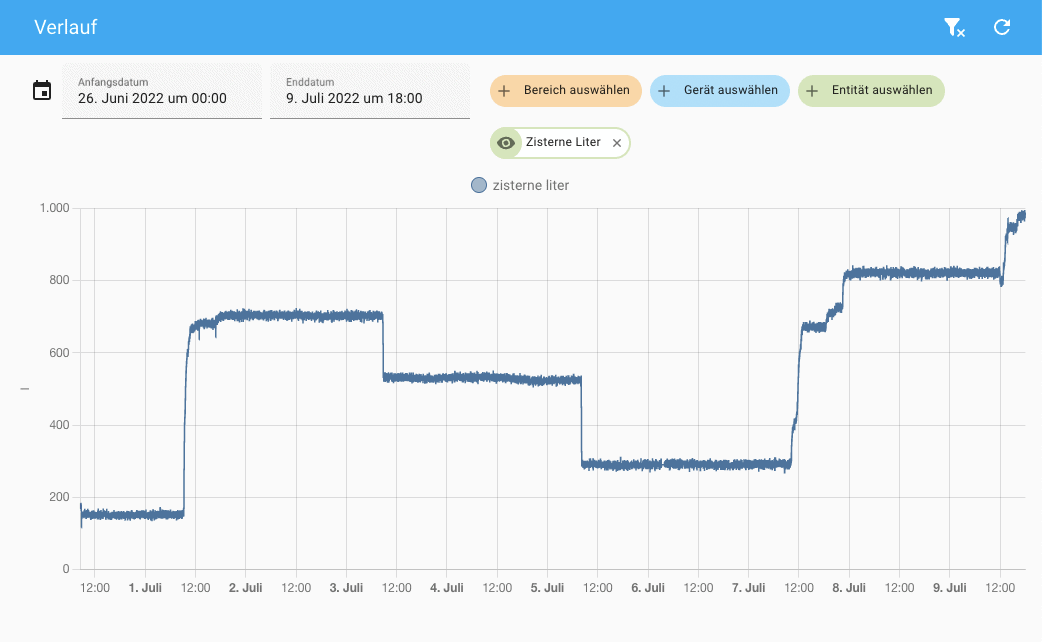
The level measurement of the cistern is also an excellent sensor when it comes to rainfall, as it receives the rainfall from 75 square metres of roof area. If the water level in the cistern is low, you can also shorten the watering times, etc.
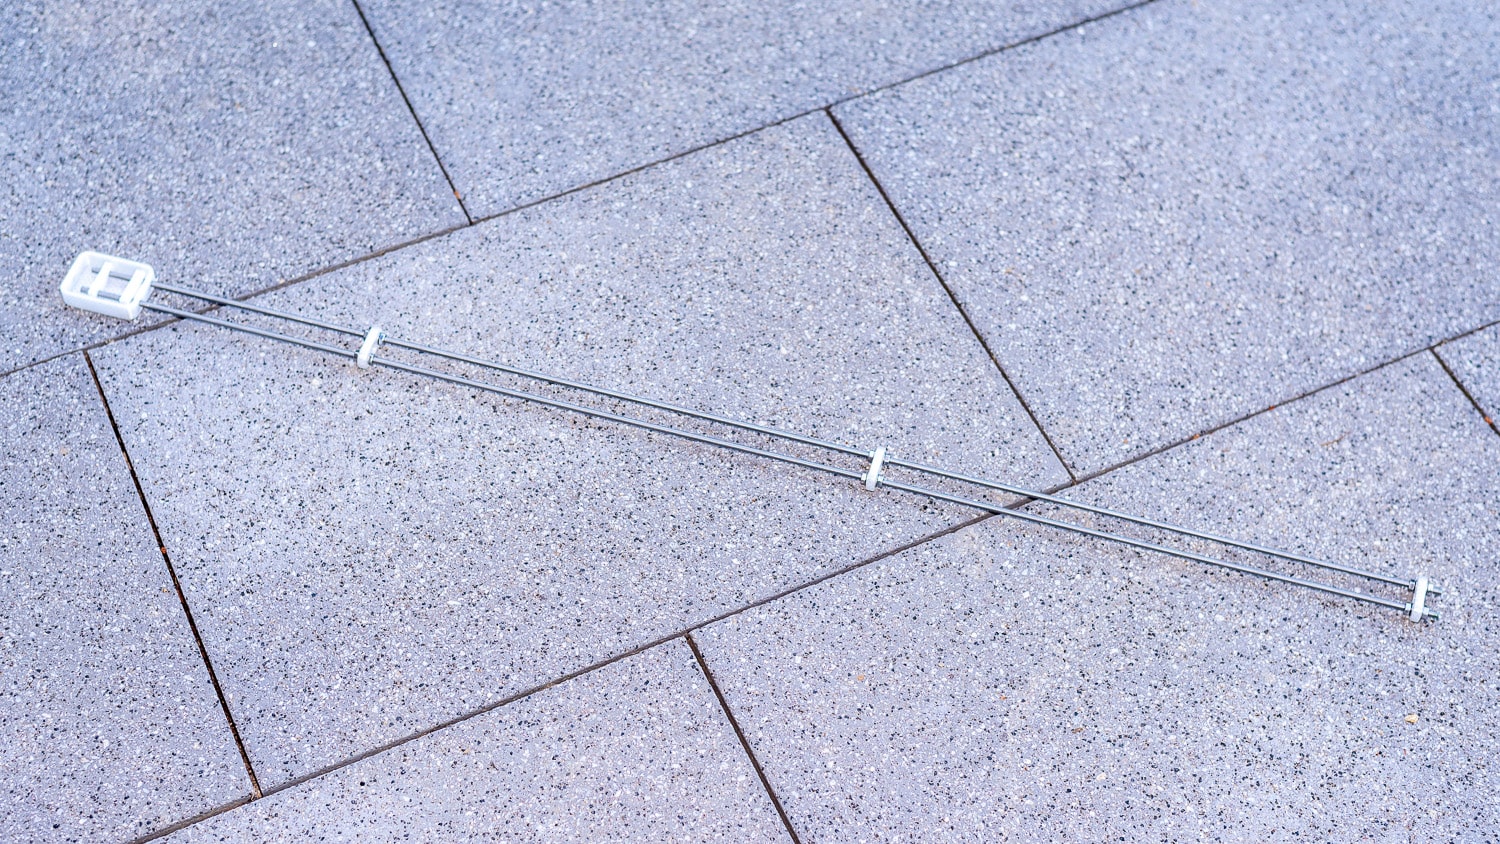
The most important values for irrigation come from a soil moisture sensor. Although capacitive sensors are relatively robust, they only measure the soil moisture in a narrow range of a few square centimetres. I have therefore built a resistive sensor from two 1 metre long stainless steel threaded rods, which are buried 20 mm apart at a depth of 10 cm.
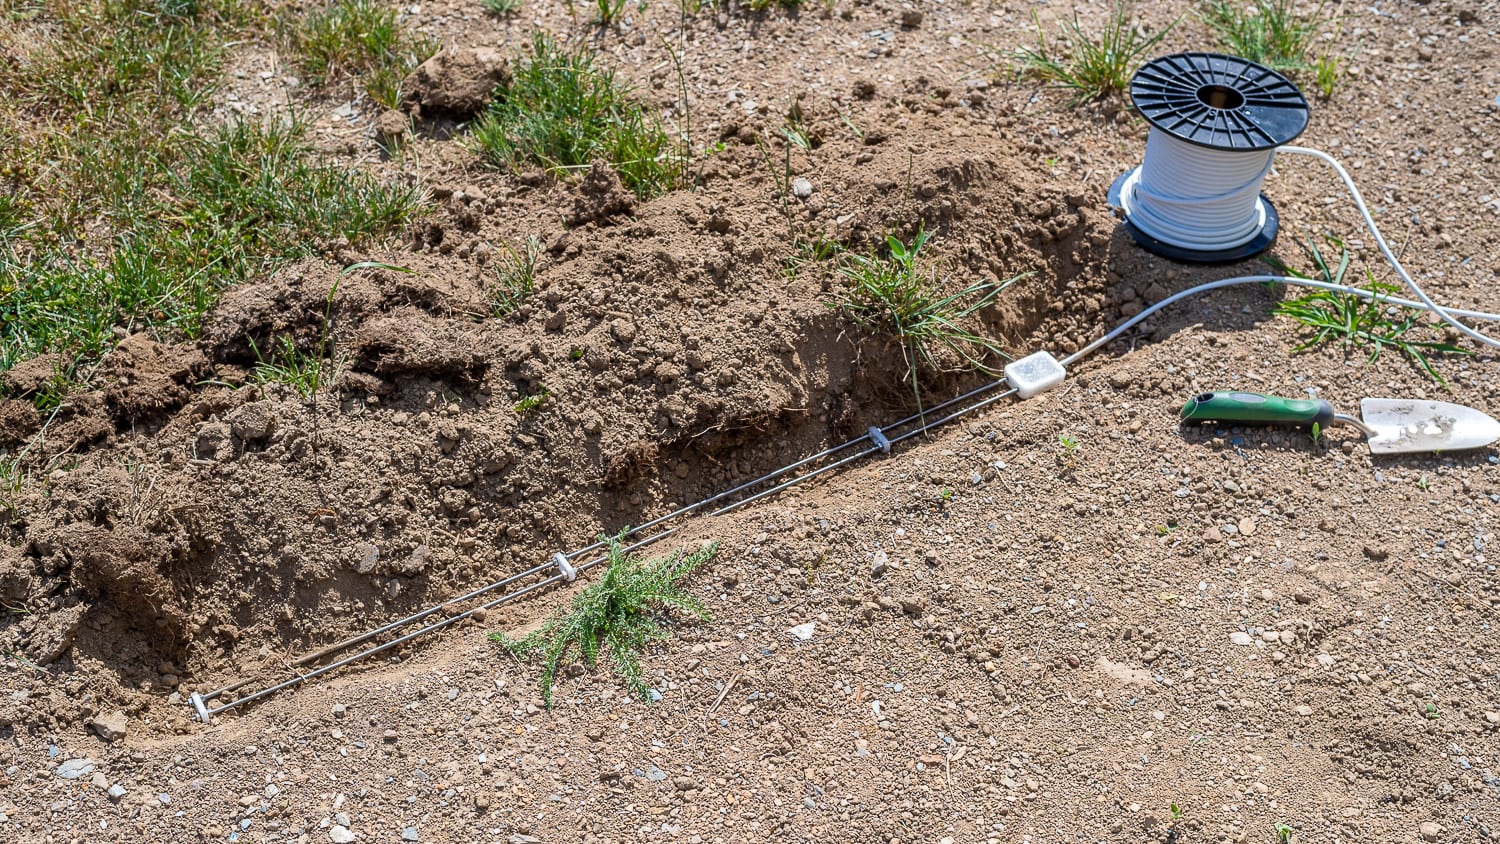
Stainless steel is corrosion-resistant and robust. The two M5 rods cost 3 euros in the special price DIY store. With this sensor, you can measure a representative area and not just selectively. As the measuring current and the resulting electrolysis could cause salts and minerals to be deposited on the electrodes over time, the measurement is only activated very briefly and at longer intervals. There will be a separate article on this.
Letzte Aktualisierung am 2026-06-11 / Affiliate Links / Bilder von der Amazon Product Advertising API


Leave a Reply