
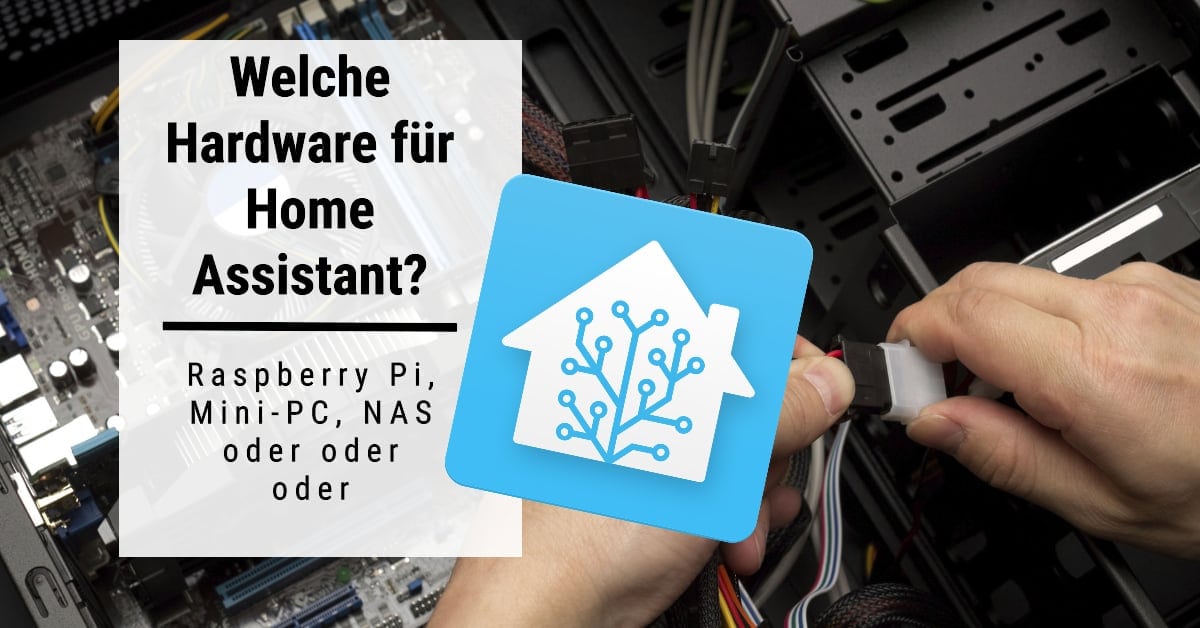
As of today, there are 2377 integrations for Home Assistant. An integration means that new functions are added. These can be extensions such as very conveniently adjustable timers or statistics functions, but also the connection of devices such as heat pumps, heating controls, televisions, smart lights, PV systems or electric cars. Of course, there are also integrations for almost all building automation standards such as KNX, LCN Issendorff, Loxone, Homematic and many others.
These integrations make Home Assistant the central hub for all smart devices in the home and enable systems, no matter how different, to be controlled and read out together. For example, when a call is received via an AVM Fritzbox, the ceiling lights can flash while the volume of the TV is reduced at the same time.
Especially in the current energy crisis, these options help to save energy by allowing heating systems to be controlled much more intelligently than the manufacturers intended. For example, presence, the weather forecast and much more can be used to optimise heating control.
1. HACS – the integration for integrations
HACS is an extension that enables access to the “Community Store”. It contains integrations that have been created by users and there are lots of interesting options here. For example, I use Irrigation Unlimited for my DIY irrigation controller.
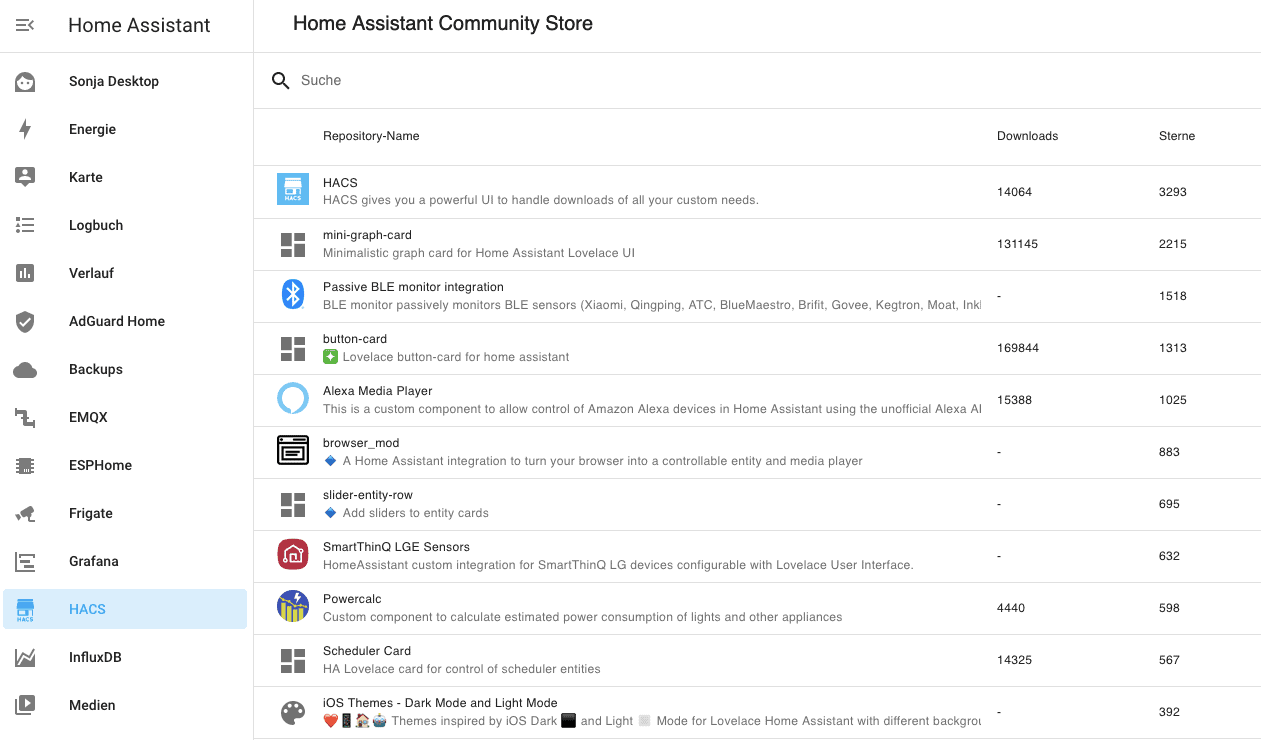
HACS can be installed with one click and is a treasure trove for almost any requirement. At HACS you will also find new options for your dashboards, interesting cards and much more.
Click here for the HACS page with further information and installation instructions
2. Power Calc – measure power consumption without tools
Power Calc can be used to determine the power consumption of many devices without the need for energy measuring devices such as a smart socket or the Shelly 3EM, which I really like.
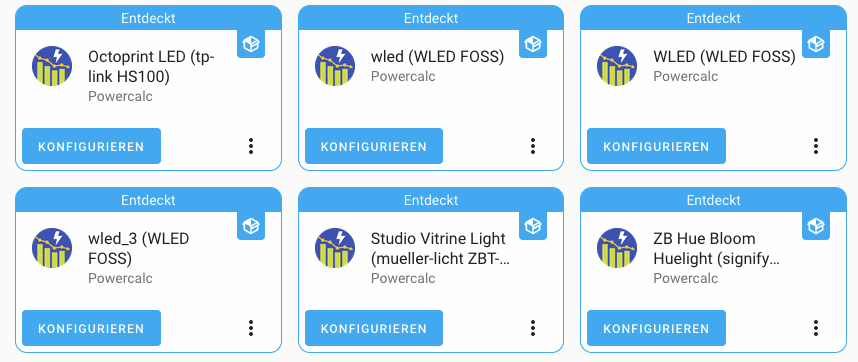
Power Calc recognises many devices such as Philips Hue lights, IKEA Tradfri, innr, WLED applications, but also other consumers if you can assign a fixed power consumption to them.
For example, if you know that the lighting in the kitchen consumes 32 watts because it consists of 8 LED spotlights with 4 watts of power, you can create a virtual consumption sensor from this. This then automatically records the consumption when the lighting is in operation.
Even dimmed light sources can be recorded with astonishing accuracy if their consumption at different brightness levels is recorded beforehand with a consumption meter and a corresponding conversion is integrated, which could look something like this:
sensor:
  - platform: powercalc
    entity_id: light.living_room_ceiling_lighting
    linear:
      calibrate:
        - 1 -> 0.3
        - 10 -> 1.25
        - 50 -> 3.50
        - 100 -> 6.8
        - 255 -> 15.3Code language: YAML (yaml)
This means that non-linear consumption, which is particularly the case with classic incandescent lamps with filaments that are dimmed, can also be recorded with Power Calc.
You can find Power Calc in the HACS Store. Click here for Power Calc on GitHub.
3. Your heating control – example Vissmann ViCare
Home Assistant offers integrations for many heating manufacturers and heat pumps. Partly as an official integration, but often via HACS.
We use a Viessmann gas boiler that has an internet gateway. This can be read out with the ViCare integration and various control options are also possible. In the free version, however, this is subject to an API limit that allows 1450 calls per 24 hours. This is sufficient for evaluation and control if, for example, 90 second intervals are set (standard 60 seconds).
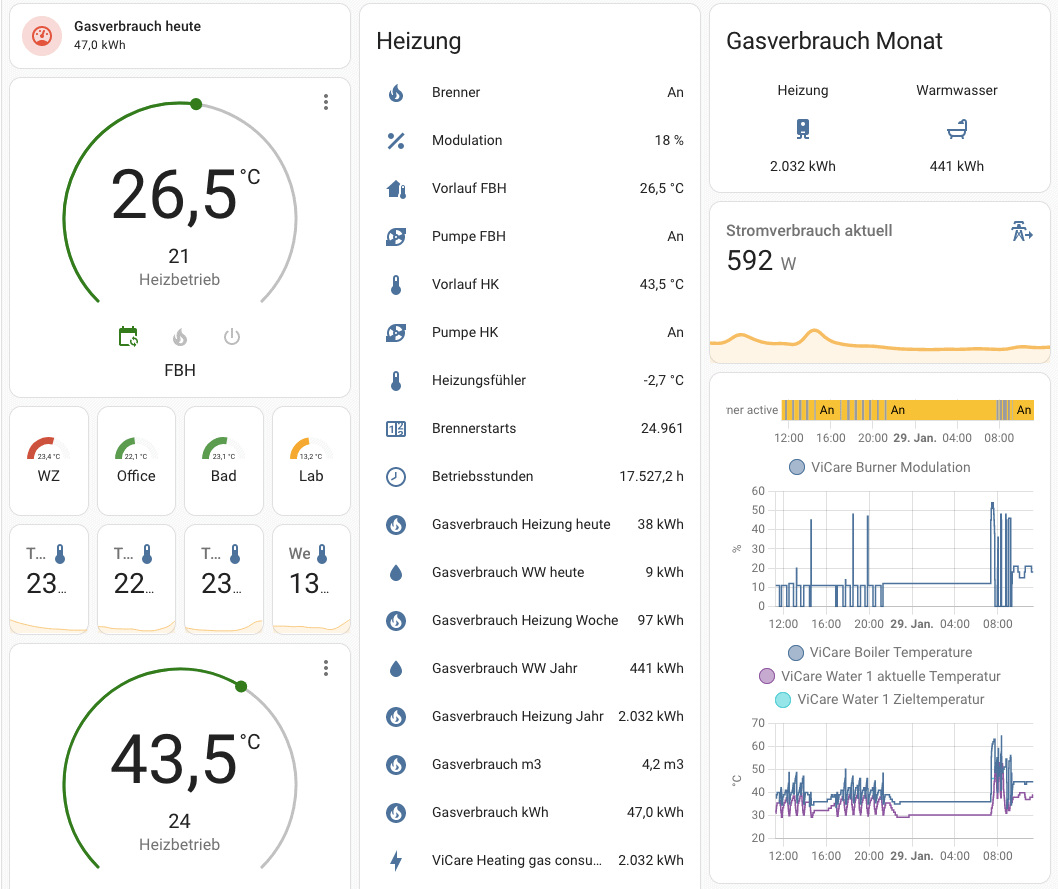
Depending on the manufacturer, this type of integration can be used to determine not only the current flow temperatures, the set temperatures for normal and reduced operation, hot water or gas consumption. It can also be used to actively intervene in the heating control system.
Heating control systems – and those from Viessmann in particular – are actually quite a nuisance because the control behaviour can hardly be understood and even specialist companies have no idea why the system does what it does. The main thing is that it gets warm …
With the integration of the heating in Home Assistant, you can now control specific heating circuits or switch off the heating completely. For example, I switch off the heating circuit for the underfloor heating and radiators when my reference rooms (living room and office) are over 22 °C and the bathroom is over 23 °C between 6.30 and 8.00 on weekdays and 7.30 and 10.00 at weekends.
The Viessmann control system would otherwise continue to heat the room happily. Thanks to various optimisations in the control system itself and the additional integration into Home Assistant, we were able to reduce our gas consumption by over 40 % in 2022 compared to 2021 – with the same (and in some cases better) level of comfort. Such integrations are also available for heat pumps from Nibe, Panasonic and Daikin, for example.
3. Thermal Comfort – perceived temperature, dew point and absolute humidity
Thermal Comfort is a helper function that calculates many important parameters from the measured temperature and humidity. This is how the perceived temperature is determined, because a room temperature of 22 °C does not always have to be pleasant.
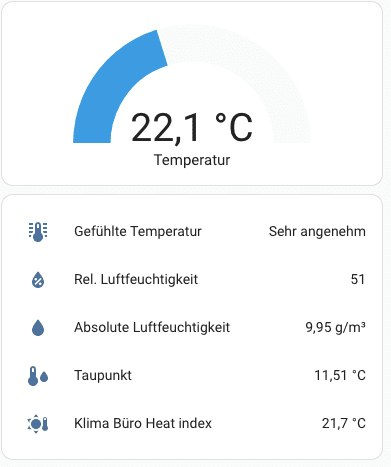
The absolute humidity is just as important. Only with this can a ventilation recommendation be given without any doubt. If the abs. humidity outside is below the abs. humidity inside, you can ventilate without hesitation. Otherwise, the window must remain closed, otherwise you will bring in even more humid air.
I have written more about this in this article https://staging.nachbelichtet.com/richtig-lueften-mit-hilfe-des-smart-homes/. The values from Thermal Comfort can then also be used to control specific displays that prompt you to ventilate, control the humidifier and dehumidifier and provide information on the dew point.
You can find Thermal Comfort in the HACS Store. Click here for the GitHub page.
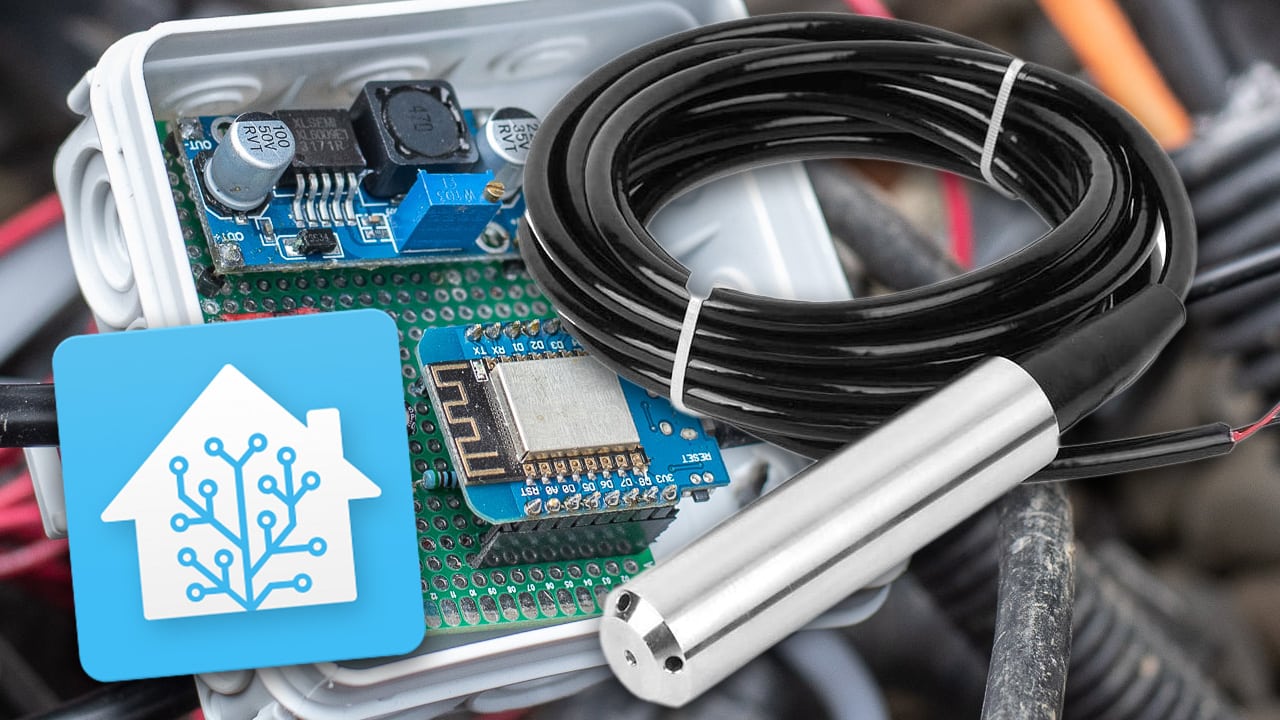
4. ESPHome – build your own sensors, displays and controls
ESPHome is an official integration of Home Assistant. It allows you to build your own hardware based on ESP microcontrollers and integrate it seamlessly into Home Assistant. Not only is this fun, but you can also use it to solve highly customised control and measurement problems.
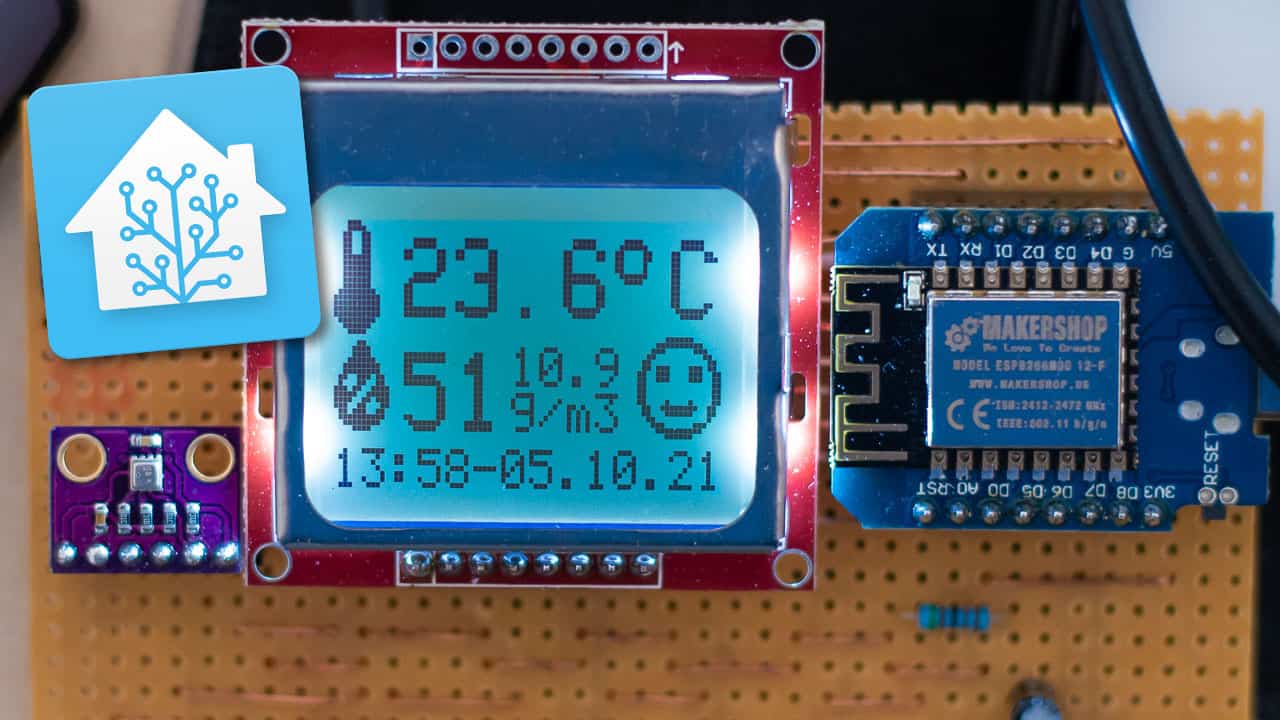
My DIY irrigation control for Gardena sprinklers runs with it, as does the temperature measurement of my heating system (stratified storage tank, flow and return temperatures) or the water level measurement in our rainwater cistern.
With the ESPHome platform, many inexpensive sensors and displays can be used to build your own smart devices. ESPHome microcontrollers can be programmed and updated directly from Home Assistant, making it much easier to create your own functions.
More information: ESPHome page

- Fernsteuerung – Geräte von überall aus verwalten Steuern Sie Lampen, Ventilatoren oder kleine Geräte bequem über eine Smart-App. Schalten Sie Geräte mit nur einem Tipp auf Ihrem Smartphone ein oder aus – egal ob Sie bei der Arbeit, auf Reisen oder zu Hause sind – und machen Sie sich nie wieder Sorgen über „vergessene Geräte“.
- Timer & Zeitpläne – Automatisieren Sie Ihren Alltag Stellen Sie individuelle Timer, Countdowns oder wiederkehrende Zeitpläne ein, um Geräte automatisch zu steuern. Beispiele: Starten Sie die Kaffeemaschine um 7 Uhr, schalten Sie die Schlafzimmerlampen um 23 Uhr aus oder stoppen Sie Ladegeräte nach 2 Stunden. Passt sich mühelos Ihrem Alltag an.
- Energieüberwachung – Verbrauch verfolgen, Kosten senken Sehen Sie Echtzeit- sowie tägliche, wöchentliche und monatliche Energiedaten in der eWeLink-App. Erkennen Sie stromintensive Geräte, passen Sie Ihr Nutzungsverhalten an und senken Sie Ihre Stromkosten mit klaren, umsetzbaren Erkenntnissen.

- [3.6” Großes LCD-Display mit täglichen Höchst- und Tiefstwerten] Das große LCD bleibt aus mehreren Metern Entfernung klar lesbar – ideal auch für Senioren. Zeigt umfangreiche Informationen auf einen Blick: Echtzeitdaten (alle 5 s aktualisiert), 24-Stunden Max/Min-Werte und Komfortstufen.
- [App-Überwachung in Echtzeit & Benachrichtigungen] Überwachen Sie Temperatur und Luftfeuchtigkeit per App aus der Ferne, mit einer Reichweite von bis zu 120 m. Erhalten Sie sofortige Warnmeldungen, sobald Werte Ihren festgelegten Komfortbereich überschreiten.
- [Fernanzeige für die Überwachung mehrerer Räume] Das Gerät kann Echtzeitdaten eines anderen Temperatur-/Luftfeuchtigkeitssensors anzeigen, nachdem dieser als Datenquelle festgelegt wurde. So erweitern Sie Ihren Überwachungsbereich – ideal für Kinderzimmer, Bad, Weinkeller oder Gewächshaus.

- [Smarte Steuerung]: Verwandeln Sie herkömmliche Geräte in smarte Geräte. Beispielsweise können Sie eine Tischlampe in eine smarte Tischlampe verwandeln und sie per Smartphone ein- und ausschalten. Um eine Einbauleuchte in eine smarte Einbauleuchte zu verwandeln, schließen Sie einfach ein Smart-Switch-Modul an und steuern Sie sie per Sprachassistenten wie Alexa, Google Assistant oder Yandex.
- [Sprachsteuerung]: Unterstützt Sprachassistenten wie Yandex Alice, Alexa und Google Home für Funktionen wie das Ein- und Ausschalten von Lampen; sagen Sie beispielsweise „Alexa, schalte das Küchenlicht ein“. Mit dieser Funktion können Sie das Licht per Sprachbefehl einschalten und ein komfortables Smart Home genießen.
- [App-Fernsteuerung]: Steuern Sie den Netzschalter, Timer, Countdown und weitere Funktionen des Geräts bequem per Smartphone. Mit einer Internetverbindung können Sie das Schaltmodul von zu Hause aus steuern.

- Fernsteuerung – Geräte von überall aus verwalten Steuern Sie Lampen, Ventilatoren oder kleine Geräte bequem über eine Smart-App. Schalten Sie Geräte mit nur einem Tipp auf Ihrem Smartphone ein oder aus – egal ob Sie bei der Arbeit, auf Reisen oder zu Hause sind – und machen Sie sich nie wieder Sorgen über „vergessene Geräte“.
- Timer & Zeitpläne – Automatisieren Sie Ihren Alltag Stellen Sie individuelle Timer, Countdowns oder wiederkehrende Zeitpläne ein, um Geräte automatisch zu steuern. Beispiele: Starten Sie die Kaffeemaschine um 7 Uhr, schalten Sie die Schlafzimmerlampen um 23 Uhr aus oder stoppen Sie Ladegeräte nach 2 Stunden. Passt sich mühelos Ihrem Alltag an.
- Energieüberwachung – Verbrauch verfolgen, Kosten senken Sehen Sie Echtzeit- sowie tägliche, wöchentliche und monatliche Energiedaten in der eWeLink-App. Erkennen Sie stromintensive Geräte, passen Sie Ihr Nutzungsverhalten an und senken Sie Ihre Stromkosten mit klaren, umsetzbaren Erkenntnissen.

- 【Intelligente Steuerung】Der ZBMINIR2 ist ein Zigbee 3.0 Ein-Kanal-Neutralleitungsschalter, der in einer Montagekasten installiert werden kann und eine maximale Last von 10 A unterstützt, womit er einfache Schalter intelligent macht.
- 【Miniaturisierte Größe】Mit 3,95 x 3,3 x 1,68 cm passt er in jede Standard-Einbauschiene. Er benötigt eine NEUTRALLEITUNG und unterstützt eine maximale Leistung von 2200 W.
- 【Personalisierter Lichtsteuerung】Machen Sie Ihre Beleuchtungssysteme intelligent an/aus. Sie können die Geräte leicht konfigurieren und ihre Einstellungen individuell verwalten oder verschiedene Geräte kombinieren, um spezifische Aktionen in Ihrem Heimautomatisierungssystem auszulösen.
5. ZHA – ZigBee Home Automation. The alternative to the Philips Bridge
ZigBee is one of the standards in the smart home. The popular Hue lamps and devices from Philips are based on this standard, as are IKEA’s Tradfri, Aqara sensors and lamps from Lidl and Müller Licht.
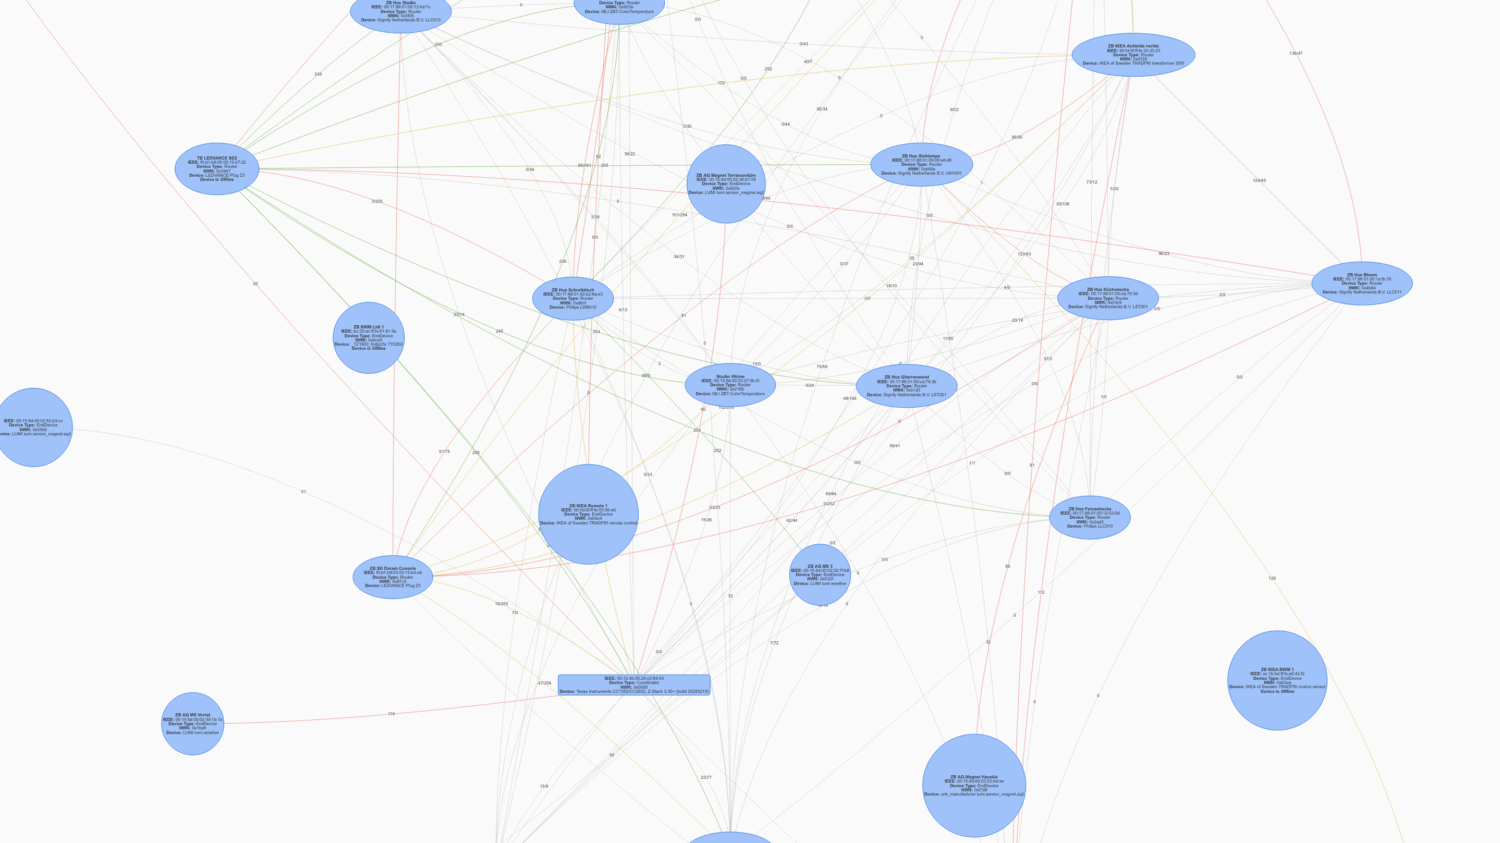
Unfortunately, the Philips Bridge cannot communicate with all devices. This is remedied by the official ZigBee integration of Home Assistant, abbreviated to ZHA. This allows ZigBee devices from almost all manufacturers to be connected and controlled directly with Home Assistant. This requires, for example, the Sonoff ZigBee 3.0 USB Dongle Plus. Recently, there is also an “official” ZigBee stick from Home Assistant, the Sky Connect Stick.
ZHA works stably, is directly integrated and is simply fun. More information: https://www.home-assistant.io/integrations/zha/
Additional tip: Studio Code Server
If you use Home Assistant Supervised, you should definitely also install the Studio Code Server. This gives you Microsoft’s excellent VSCode programming environment directly in the browser and in Home Assistant. Not only can you edit Home Assistant configuration files conveniently and with code completion, but you can also programme ESPHome projects much more easily.
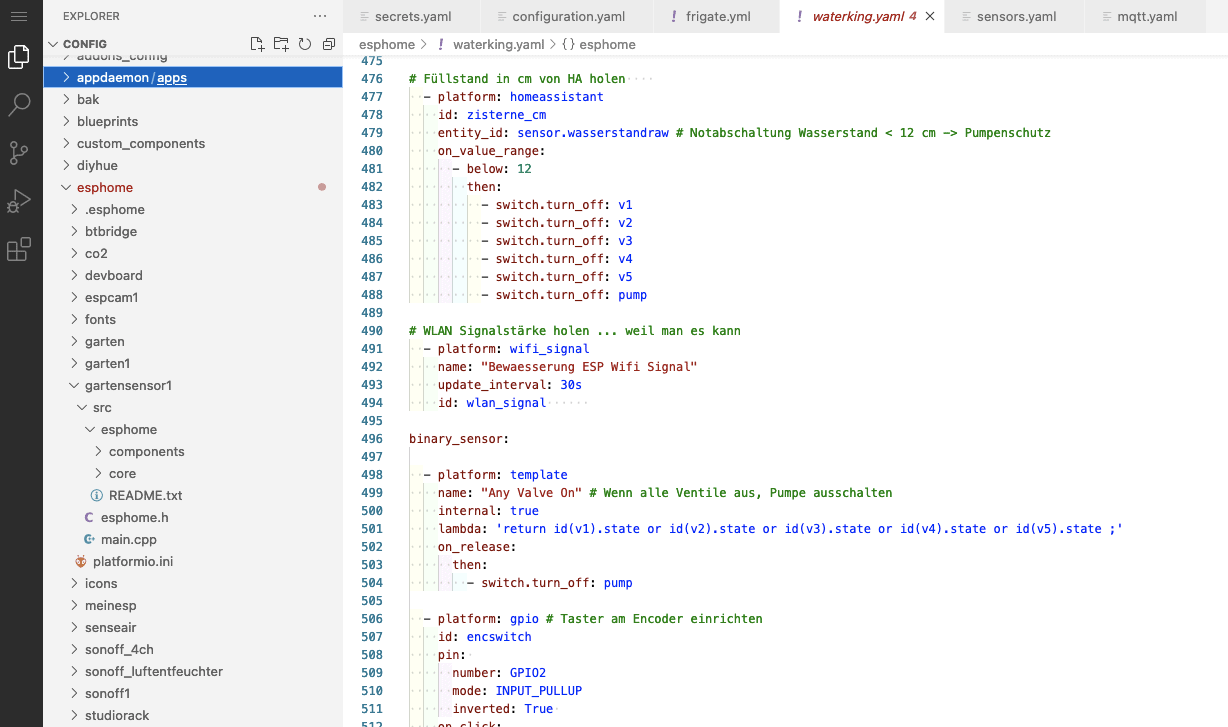
The Studio Code Server is an add-on and not directly an integration. Add-on means that it is an application that runs as a Docker container in the Supervised environment.
Studio Code Server Add-on project page
These were my 5 recommendations for Home Assistant integrations that I use myself. Of course, the individual requirements are decisive and the mass of extensions and add-ons, which is still growing daily, makes it almost impossible to give general recommendations. However, I am sure that these extensions for Home Assistant will also be of use to you.
Letzte Aktualisierung am 2026-06-11 / Affiliate Links / Bilder von der Amazon Product Advertising API

Leave a Reply