
I started working with Home Assistant in June 2020. At that time, I already had a smart home hub in productive use with IP Symcon. After the first attempts on a test system, parallel to Symcon, I was quickly convinced that Home Assistant is a completely different world. The huge community, the selection of integrations and add-ons, as well as the modern technical foundation and, above all, countless developers working on rapid progress were just some of the reasons.
As I had already built and used my own sensors and actuators based on ESPeasy and Tasmota, the ESPhome platform with its close integration into Home Assistant was also a strong argument in favour of switching. At this point, my Symcon installation had reached a certain level of complexity (1200 variables – comparable to Home Assistant entities), which I naturally had to re-implement in Home Assistant. What initially put me off a little was surprisingly easy to solve from today’s perspective. Requirements, automation logic etc. were already known and “only” had to be set up on the new platform with its possibilities.
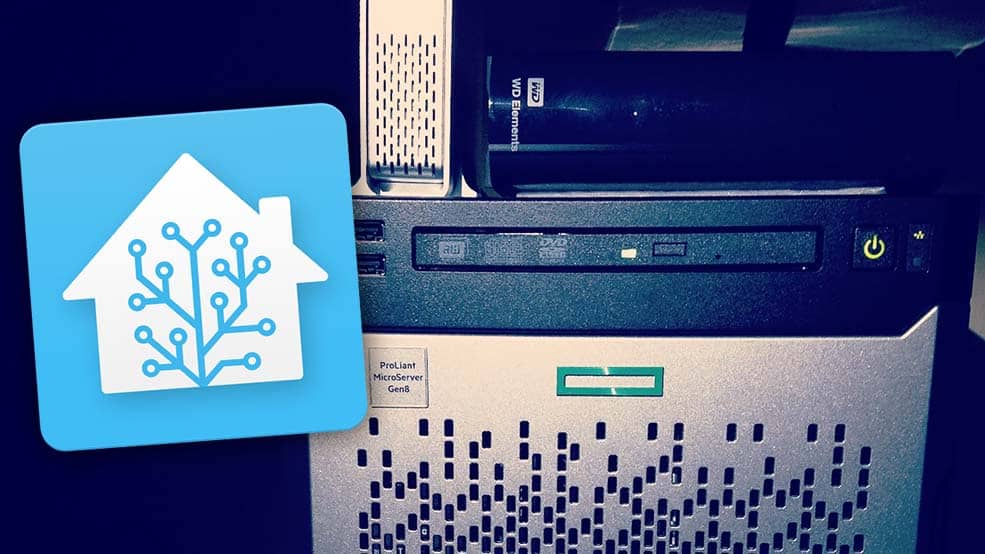
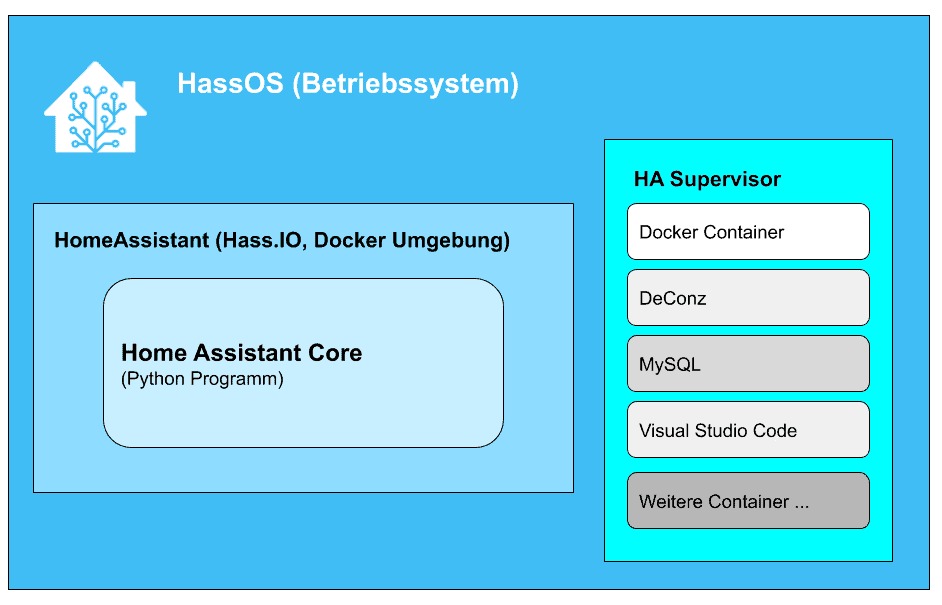
The technical basis for Home Assistant in my initial test system was a Raspberry Pi 4. In August 2020, I then switched to UnRaid for my home server and set up Home Assistant as a virtual machine in UnRaid. This is still my productive system. It gives me all the benefits of Home Assistant Supervisor, such as automatic backups, add-on updates, etc. In addition, my HP Microserver Gen 8 with Intel XEON E3-1240 CPU and 16 GB RAM offers me plenty of performance to handle even demanding applications such as camera surveillance with Frigate and 6 cameras.
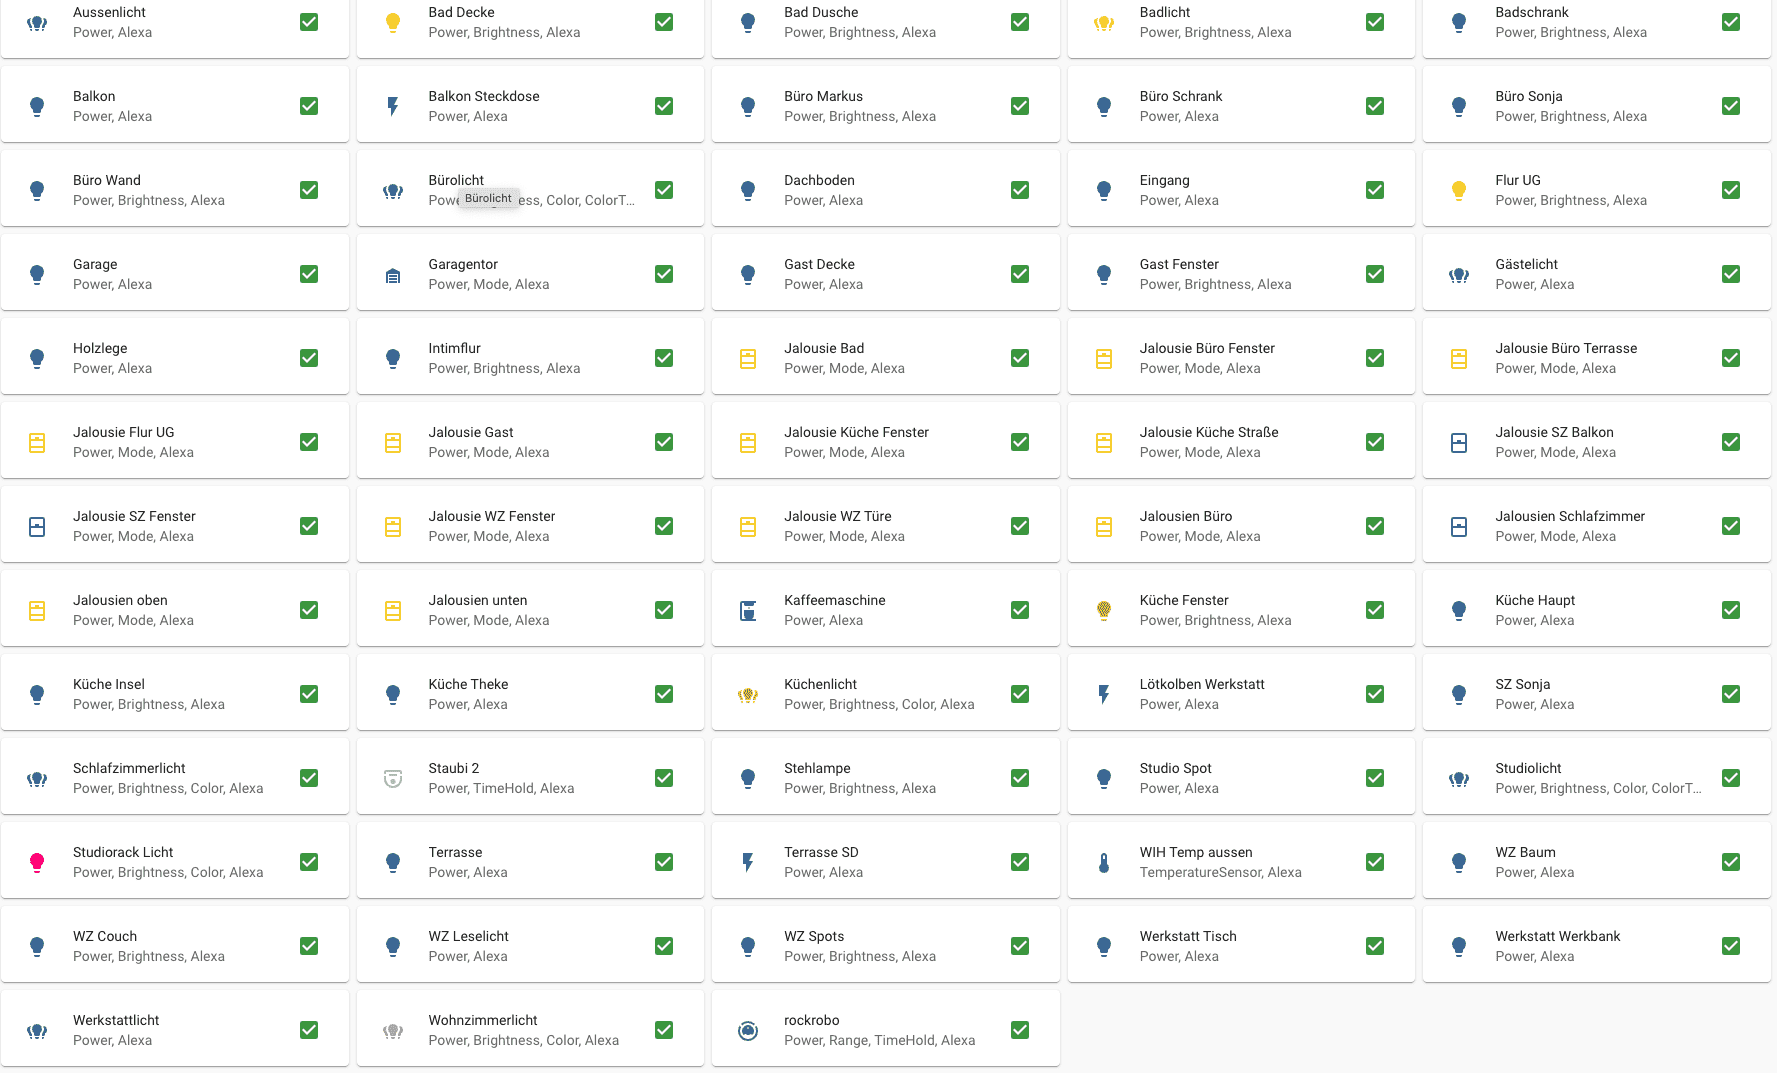
I am currently using 42 integrations and 20 add-ons. In total, that makes, as of today:
Sensors: 882
Lamps: 116
Switches: 201
Binary sensors: 172
Automations: 79
The lights and switches also include “virtual” devices, e.g. from my LCN installation, Alexa, PCs, TV and ESPHome devices.
Home Assistant processes this without any significant load and has done so extremely reliably for 2 years. I haven’t had any total failures or major problems since then. Of course, I regularly back up the configuration and installation. Occasionally, I also make a copy of the virtual machine, which I could also start on another system at any time – together with the current backups of the configuration.
Tips and tricks for Home Assistant
Here I would like to give you a few tips that, in my opinion and experience, are helpful for getting started and running Home Assistant.
Before you start, however, you should consider whether you are ready for such a system – unless you are already using a different system and are considering switching to Home Assistant. It requires a considerable amount of familiarisation and you should be reasonably proficient in English, as the community is in English. However, you will find a solution for practically every topic and the community is very helpful and friendly. In addition, there is not only the official Home Assistant forum, but also a sub-Reddit and a Discord server for exchanging ideas. I often find the most interesting content and suggestions on Reddit – and also the quickest help.
You have to be able and willing to invest time. Many people want a system like mine, but don’t realise how much time and effort is involved. Also, you shouldn’t use a system like this for critical functions. Basic functions such as heating control, switching lights, etc. must also work without such software. You should also bear in mind that others must also be able to operate and maintain the system in an emergency. I published a few thoughts on this here: 5 reasons why you shouldn’t have a smart home
1. The technical platform
A Raspberry Pi 3 (preferably 4) is all you need to get started with Home Assistant (HA). If you already have a home server, you can also run HA as a Docker container. Both are quick and easy. For the permanent operation of Home Assistant on a Raspi, you should think about an SSD instead of the micro SD card, because one day the SD card will fail.
You can also breathe new life into an old laptop as a Home Assistant server. Even older laptops consume comparatively little power, but are still more powerful than a Raspberry Pi. What’s more, if the battery is still OK, you also have an uninterruptible power supply (UPS) built in, which can bridge power outages.
You can find more tips on the best platform for Home Assistant with advantages and disadvantages here: Starting with Home Assistant – which platform to choose?
2. Entities, templates, YAML & co: Understanding the basics
More and more integrations can be configured in Home Assistant at the click of a mouse. Nevertheless, the basic configuration is done with YAML and thus in a markup language that takes some getting used to, which works with indentations and is often difficult to understand, especially for beginners.
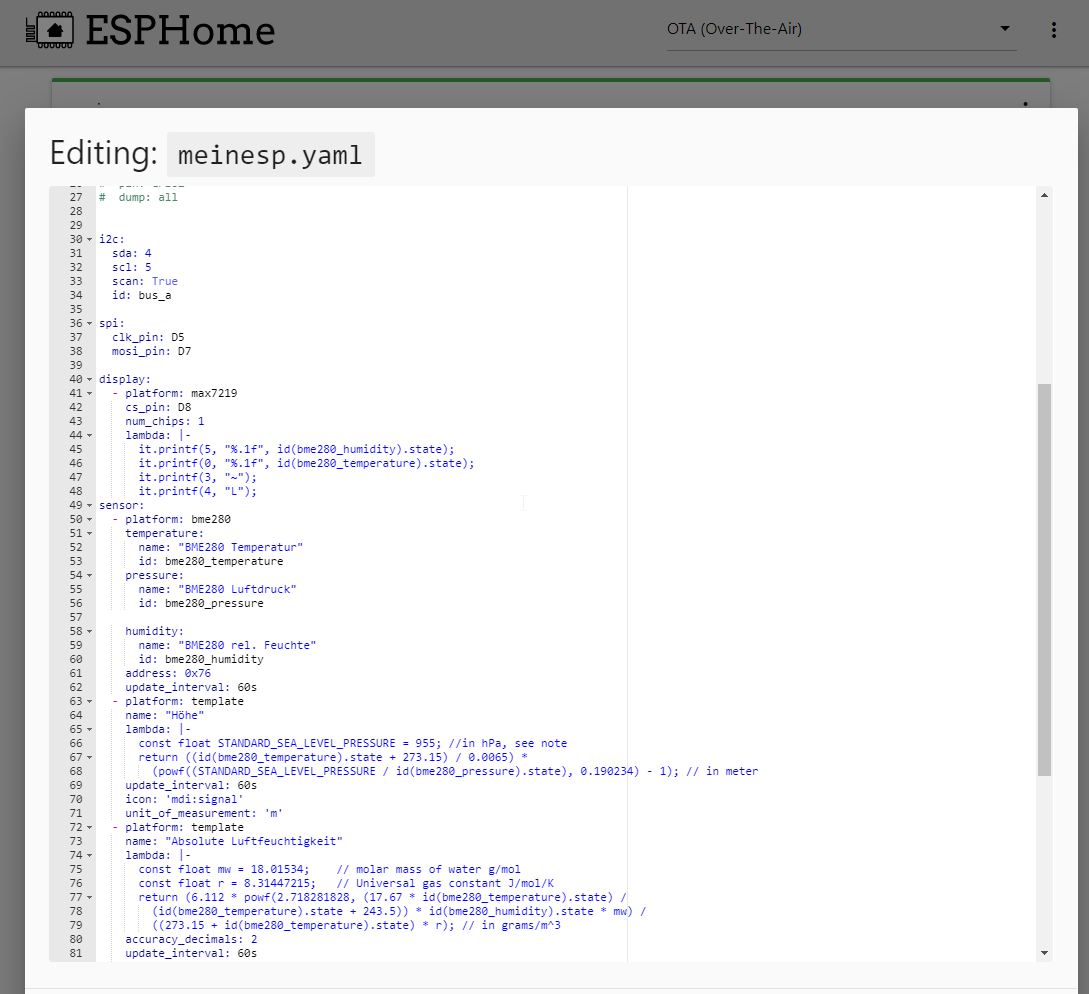
Microsoft VS Code, which can be seen as the standard editor for Home Assistant, is not the only helpful tool here. This is also available as an add-on and is therefore deeply integrated into Home Assistant. It offers code completion and can list entities automatically. I would say that almost 90% of the problems you have with Home Assistant at the beginning are due to errors in the YAML configuration.
You should also first learn the different terms and their meaning and use. In this example, I have tried to demonstrate the most important Home Assistant terms in an example:
Home Assistant basics with coffee machine and Alexa
3. Structuring and documenting
At the beginning, you are euphoric and configure and integrate everything you can. Only a little later, this can develop into a confusing juggernaut. That’s why you should structure your configuration clearly right from the start and document it – at least with comments in the code. You do not have to and should not create all configurations in configuration.yaml. For example, I have created all lamps, switches, automations, Alexa settings and sensors in separate YAML files organised by room. The configuration.yaml then reads
light: !include lights.yaml
automation: !include automations.yaml
script: !include scripts.yaml
scene: !include scenes.yaml
switch: !include switch.yaml
sensor: !include sensors.yaml
alexa: !include alexa.yamlCode language: YAML (yaml)
which refers to the individual, cleanly separated configurations and integrates them.
I also use Nimbus Note as a notebook for my configurations. I can also insert code snippets and screenshots here and have it available anytime and anywhere.
4. Device selection and interfaces
Once you’ve started with Home Assistant, you want to be able to integrate, control and read out everything. That’s why it’s important to research whether someone has already managed to integrate it into Home Assistant or whether there is even an official integration for it before purchasing new devices.
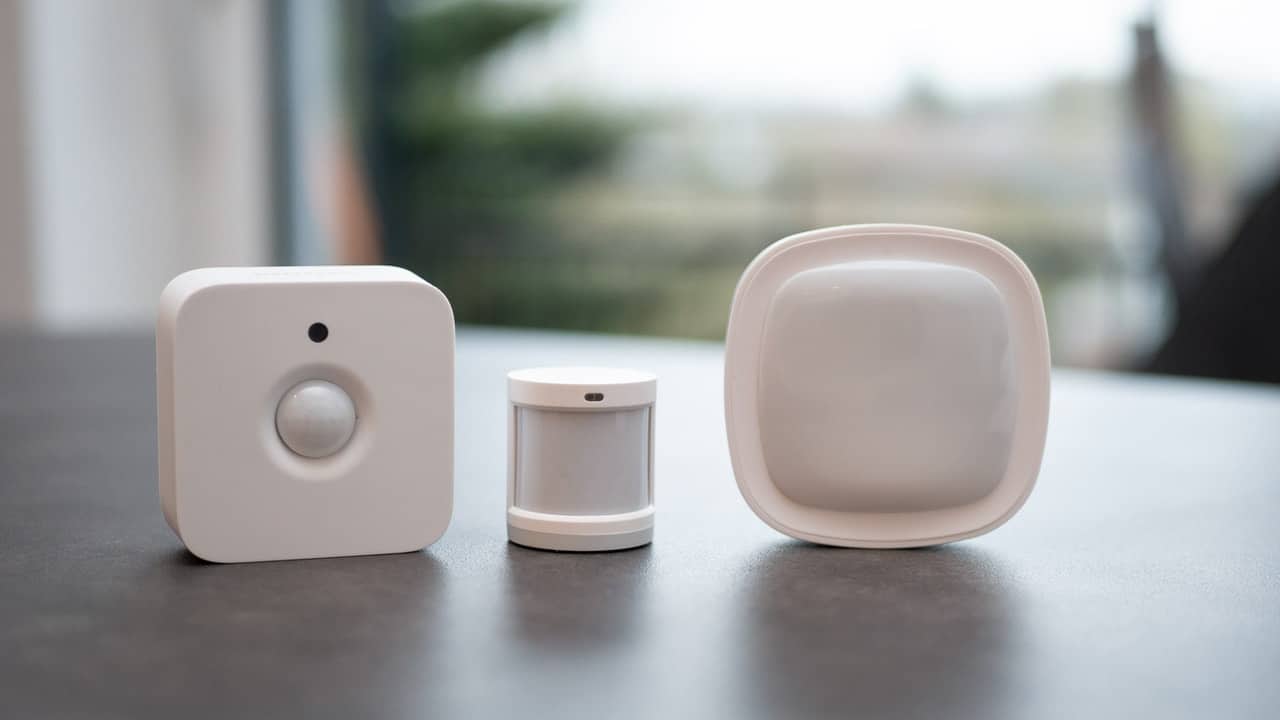
Many devices have different manufacturers and names, but still work on the same technical basis. The Philips Hue system is based on the ZigBee protocol, which is also used by Lidl’s Silvercrest Smarthome devices or IKEA’s Tradfri. The Xiaomi Aqara sensors also work with it. However, if you only use the official Philips Bridge, third-party manufacturers often cannot be used.
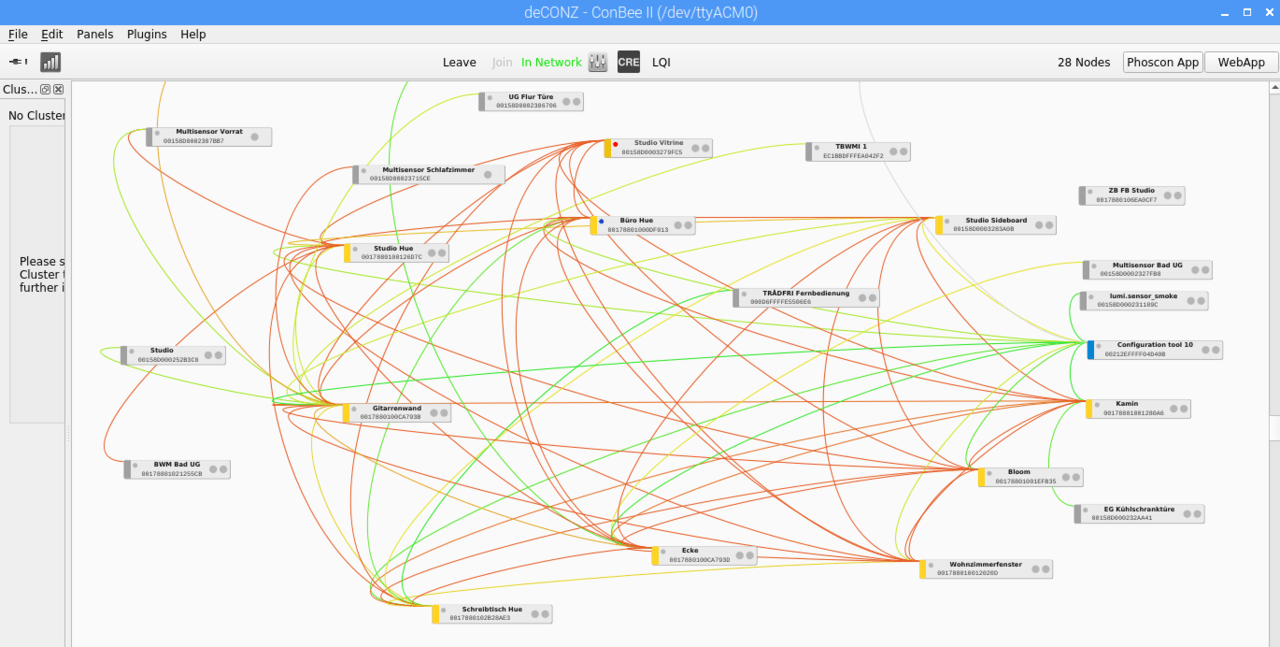
The Conbee II stick or the ZHA integration and a Sonoff Zigbee 3.0 Dongle Plus can help here. Many inexpensive Wifi lamps run with the Tuya system and can be integrated into Home Assistant.
Vacuum robots, electric cars, heaters, heat pumps and wallboxes or PV inverters, you want to control and monitor with Home Assistant. So it’s better to check before you buy whether the device in question also provides an API and interface that can be used with HA.
5. Nabu Casa Cloud or better not?
Nabu Casa is a company that supports Home Assistant. They also offer a paid cloud solution that simplifies the connection of Alexa and Google Assistant for voice control and output and enables secure remote access to Home Assistant. This currently costs $6.50 per month or $65.00 per year, which also supports the development of Home Assistant.
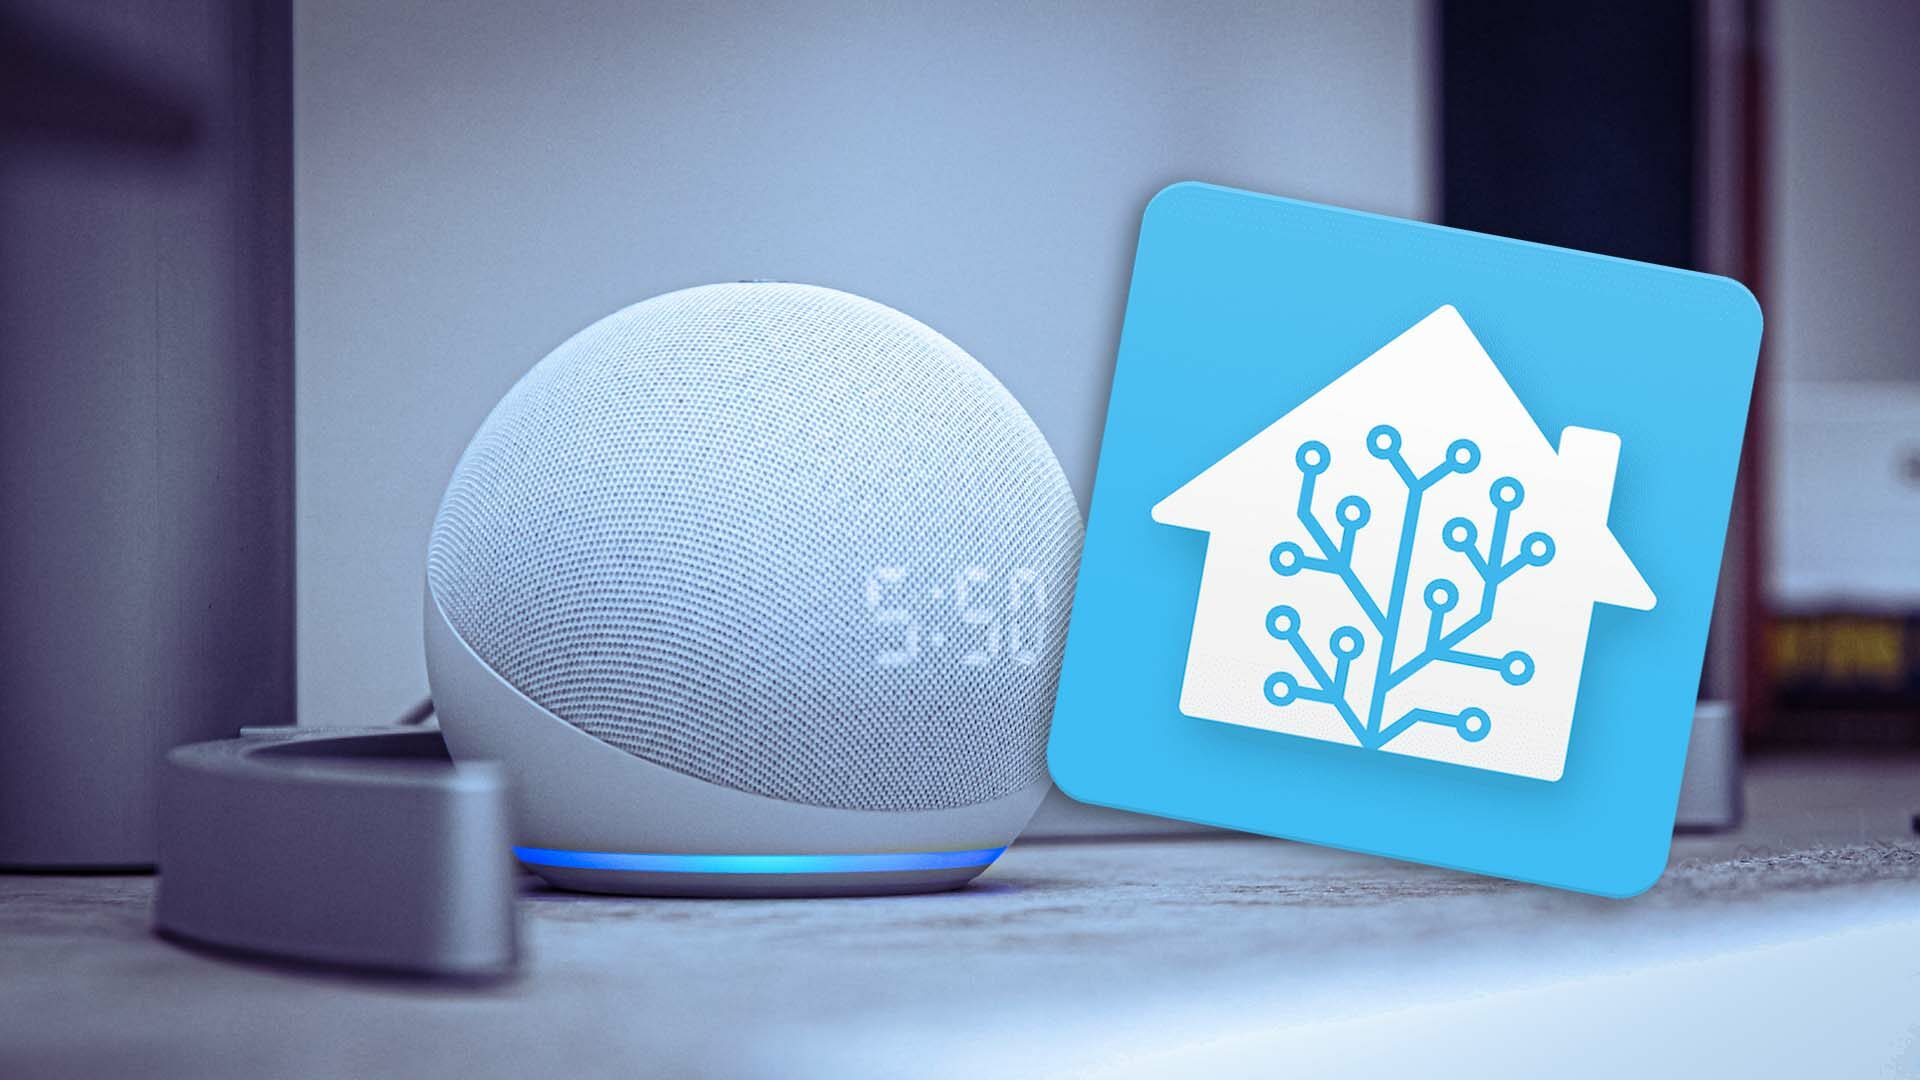
However, Nabu Casu repeatedly struggles with problems in terms of speed and availability – especially with the Alexa connection, which is of course also due to the great popularity and growing user base of HA. For us, voice control makes up a large part of our interaction with our smart home, so this is a very critical part of the functionality.
I therefore decided at the beginning of the year to do without Nabu Casa and take the Alexa connection into my own hands. It’s a bit of a one-off effort, but it’s also feasible for beginners. However, you will be rewarded with a much better response time for voice inputs and outputs.
I have described the manual setup of Alexa in Home Assistant here: Home Assistant and Amazon Alexa without Nabu Casa: Faster and more reliable
To secure remote access, you need a (free) Cloudflare account, an NGINX reverse proxy and network experience. I will be publishing an article on this soon.
If you want to keep it simple, start with Nabu Casa. However, you should define the entities and functions manually so that not every entity is synchronised with Alexa. I have written this article about this: Home Assistant: Integrating entities cleanly into Amazon Alexa (nachbelichtet.com)
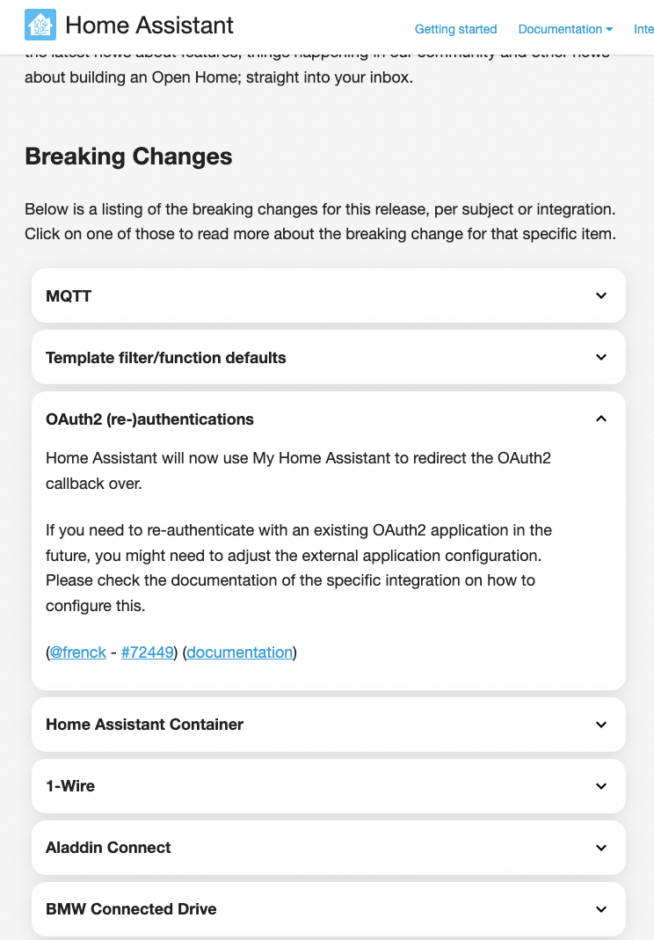
6. Read the changelog before the update!
Home Assistant is one of the 10 largest open source projects on Github. Over 1900 developers are working on the programme core and a further 63,000 developers are working on extensions and add-ons. HA is therefore incredibly fast and often publishes 6 core updates per month.
However, as Home Assistant is still a very young project, some functions are thrown overboard or rebuilt. The change log refers to “Braking Changes” and you should read these before every update to see if there is a function that you use yourself. Otherwise you may be surprised why something no longer works after the update. This is where tip #3 from this article comes in handy again.
7. Can you save heating costs with Home Assistant?
Clear answer: Yes and no! You can currently read everywhere that you can save heating costs with intelligent control. A few days ago there was even a headline that electronic thermostats are to become mandatory in rented flats.
However, lowering and later raising the room temperature is not very effective and can even lead to increased consumption. In addition, sensors, actuators and controls themselves consume electricity. Individual room control (ERR) of the heating system is therefore superfluous in modern homes, even if it is initially mandatory (you can be exempted from this).
The typical actuators consume around 2 watts per valve. We have underfloor heating on 180 square metres with 25 heating circuits. If all the valves are open, this alone consumes 50 watts of electricity. You have the choice between NC (normally closed) and NO (normally open). In our area, NO actuators make more sense, as the heating valves are open more often than they are closed throughout the year.
Then there are the actuators that control the valves, electronic temperature sensors for each room including electronics and the smart home server. That’s an optimistic 10 watts for the actuators/electronics. If we assume a heating period of 210 days and 12 hours of heating per day, we arrive at 126 kWh of electricity for the valves and 87.6 kWh for the control system (which has to run all year round), i.e. around 214 kWh. At €0.35 per kWh, that’s already €74.90 per year just for the control unit. We don’t include the Home Assistant server because we also want to control other things.
What you should do instead is perfect hydronic balancing of the heating. Home Assistant and helped me a lot with this, because I not only logged my heating data including gas consumption over 24 months, but also room and outside temperatures. This enabled me to gradually optimise the flow of my heating circuits so that the same room temperatures prevail without ERR and solar input from sunshine on the floor is not prevented by valves from being used throughout the house. The heating does not cycle unnecessarily and since moving in in 2018 and hiring the heating engineer, we have been able to reduce consumption by over 30 %.
Long answer: Yes, Home Assistant can help you save energy – but more indirectly, because it gives you a much deeper insight and a better overview of temperature curves and trends. We have also found that a reduction of more than 2 degrees leads to higher consumption.
8. Measure and optimise power consumption with Home Assistant
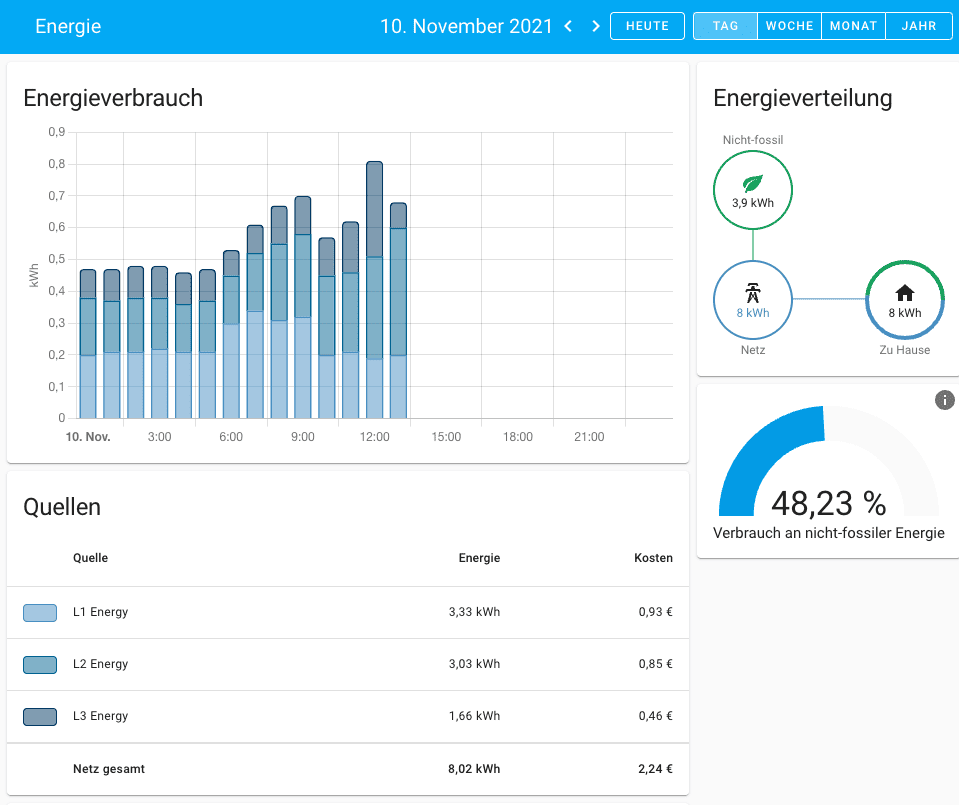
Electricity consumption can now be tracked perfectly in Home Assistant – both for grid consumption and feed-in. If you don’t have a smart meter that can be read out via an interface, you can use the inexpensive Shelly 3EM. I have described its options here: Measuring electricity consumption with the Shelly 3EM and Home Assistant
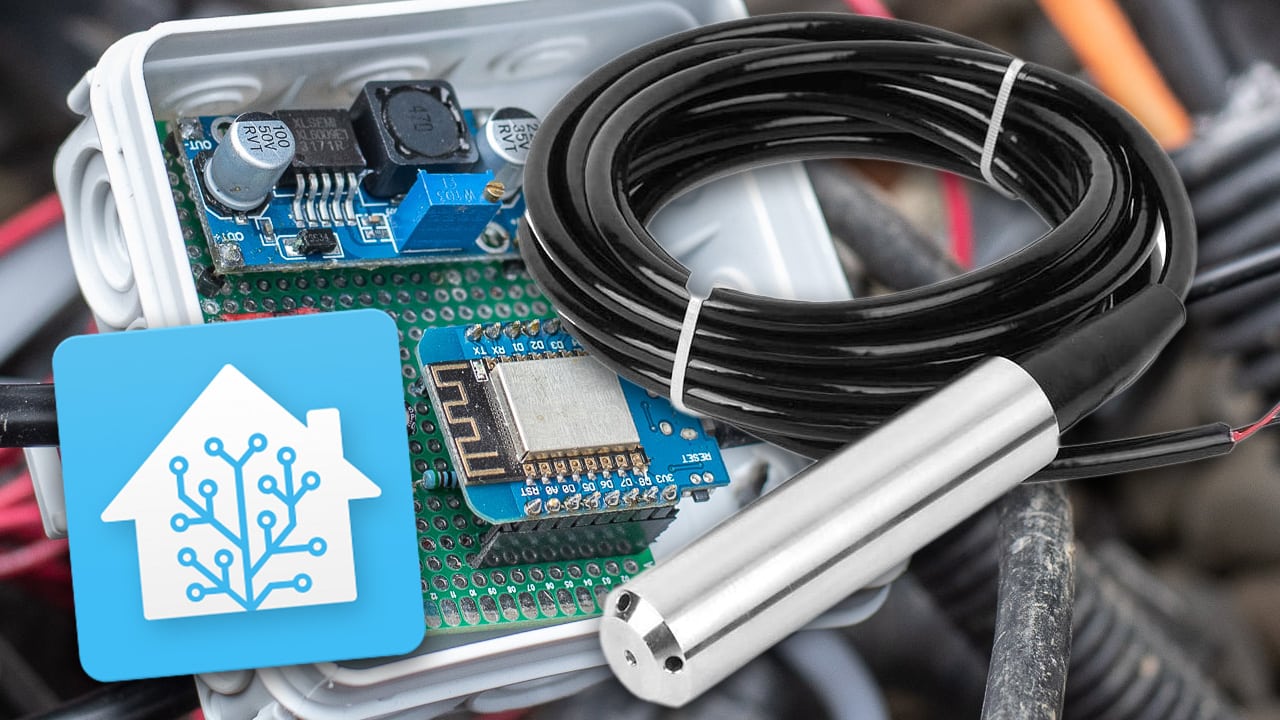
DIY solutions such as pulse counters on the Ferraris meter (I once had a construction proposal here: How the TCRT5000 works with ESPeasy as a pulse counter (nachbelichtet.com)) are no longer worthwhile here and are also too inaccurate. Smart control of loads according to presence and time of day can save a lot of electricity, for example, if you take the many standby loads off the mains or send computers to sleep and wake them up using the Home Assistant.
9. Don’t tinker with mains voltage!
Home Assistant and the many inexpensive devices tempt you to connect devices that are operated with mains voltage. As a layman, this is life-threatening and, in the worst-case scenario, will also invalidate your insurance cover.

If you have no experience or training in this area, even YouTube tutorials won’t help, as you can’t judge whether the Youtuber has any idea about it. There and in various forums you can often see hair-raising things – especially from the USA. Never build devices with simple relay boards and breadboards for operation on the mains and never tinker around in the power distributor!
Get professional help, because it’s affordable – a human life is not.
10. Do what makes sense and helps
Think about what you want to achieve and what is necessary to do so. Do you want the added convenience of being able to switch off all lights and appliances centrally and close the garage door when you go to bed? Or a scene that starts your evening in front of the TV with the right lighting mood, programme and closed blinds?

Or perhaps additional security with door and window sensors, intelligent object recognition and electronic locks? Almost anything is possible. But first concentrate on the things that make life easier in a simple way. One of my most frequently used automation systems switches on the lights in the office when required, automatically raises and lowers the external blinds depending on the position of the sun to prevent glare and starts the radio and computer in the morning. The coffee machine is activated on demand and I am also informed when I need to clean it.
Conclusion
In my opinion, and after visiting various other solutions such as Symcon, OpenHAB or ioBroker, Home Assistant is unrivalled. The sheer number of developers, integrations and supported devices makes the open source solution unique.
In the two years that I have been running a fairly complex and ever-growing system, I have not had any critical failures or hangs. Home Assistant is quite easy and convenient to configure after a certain familiarisation period. Of course, you are constantly learning and it has a certain addictive potential. At the same time, the developers are working on simplifications and making it possible to do more and more without YAML code.

I am currently working on integrating the garden irrigation system, for which I have developed my own controller for the 24 volt valves.
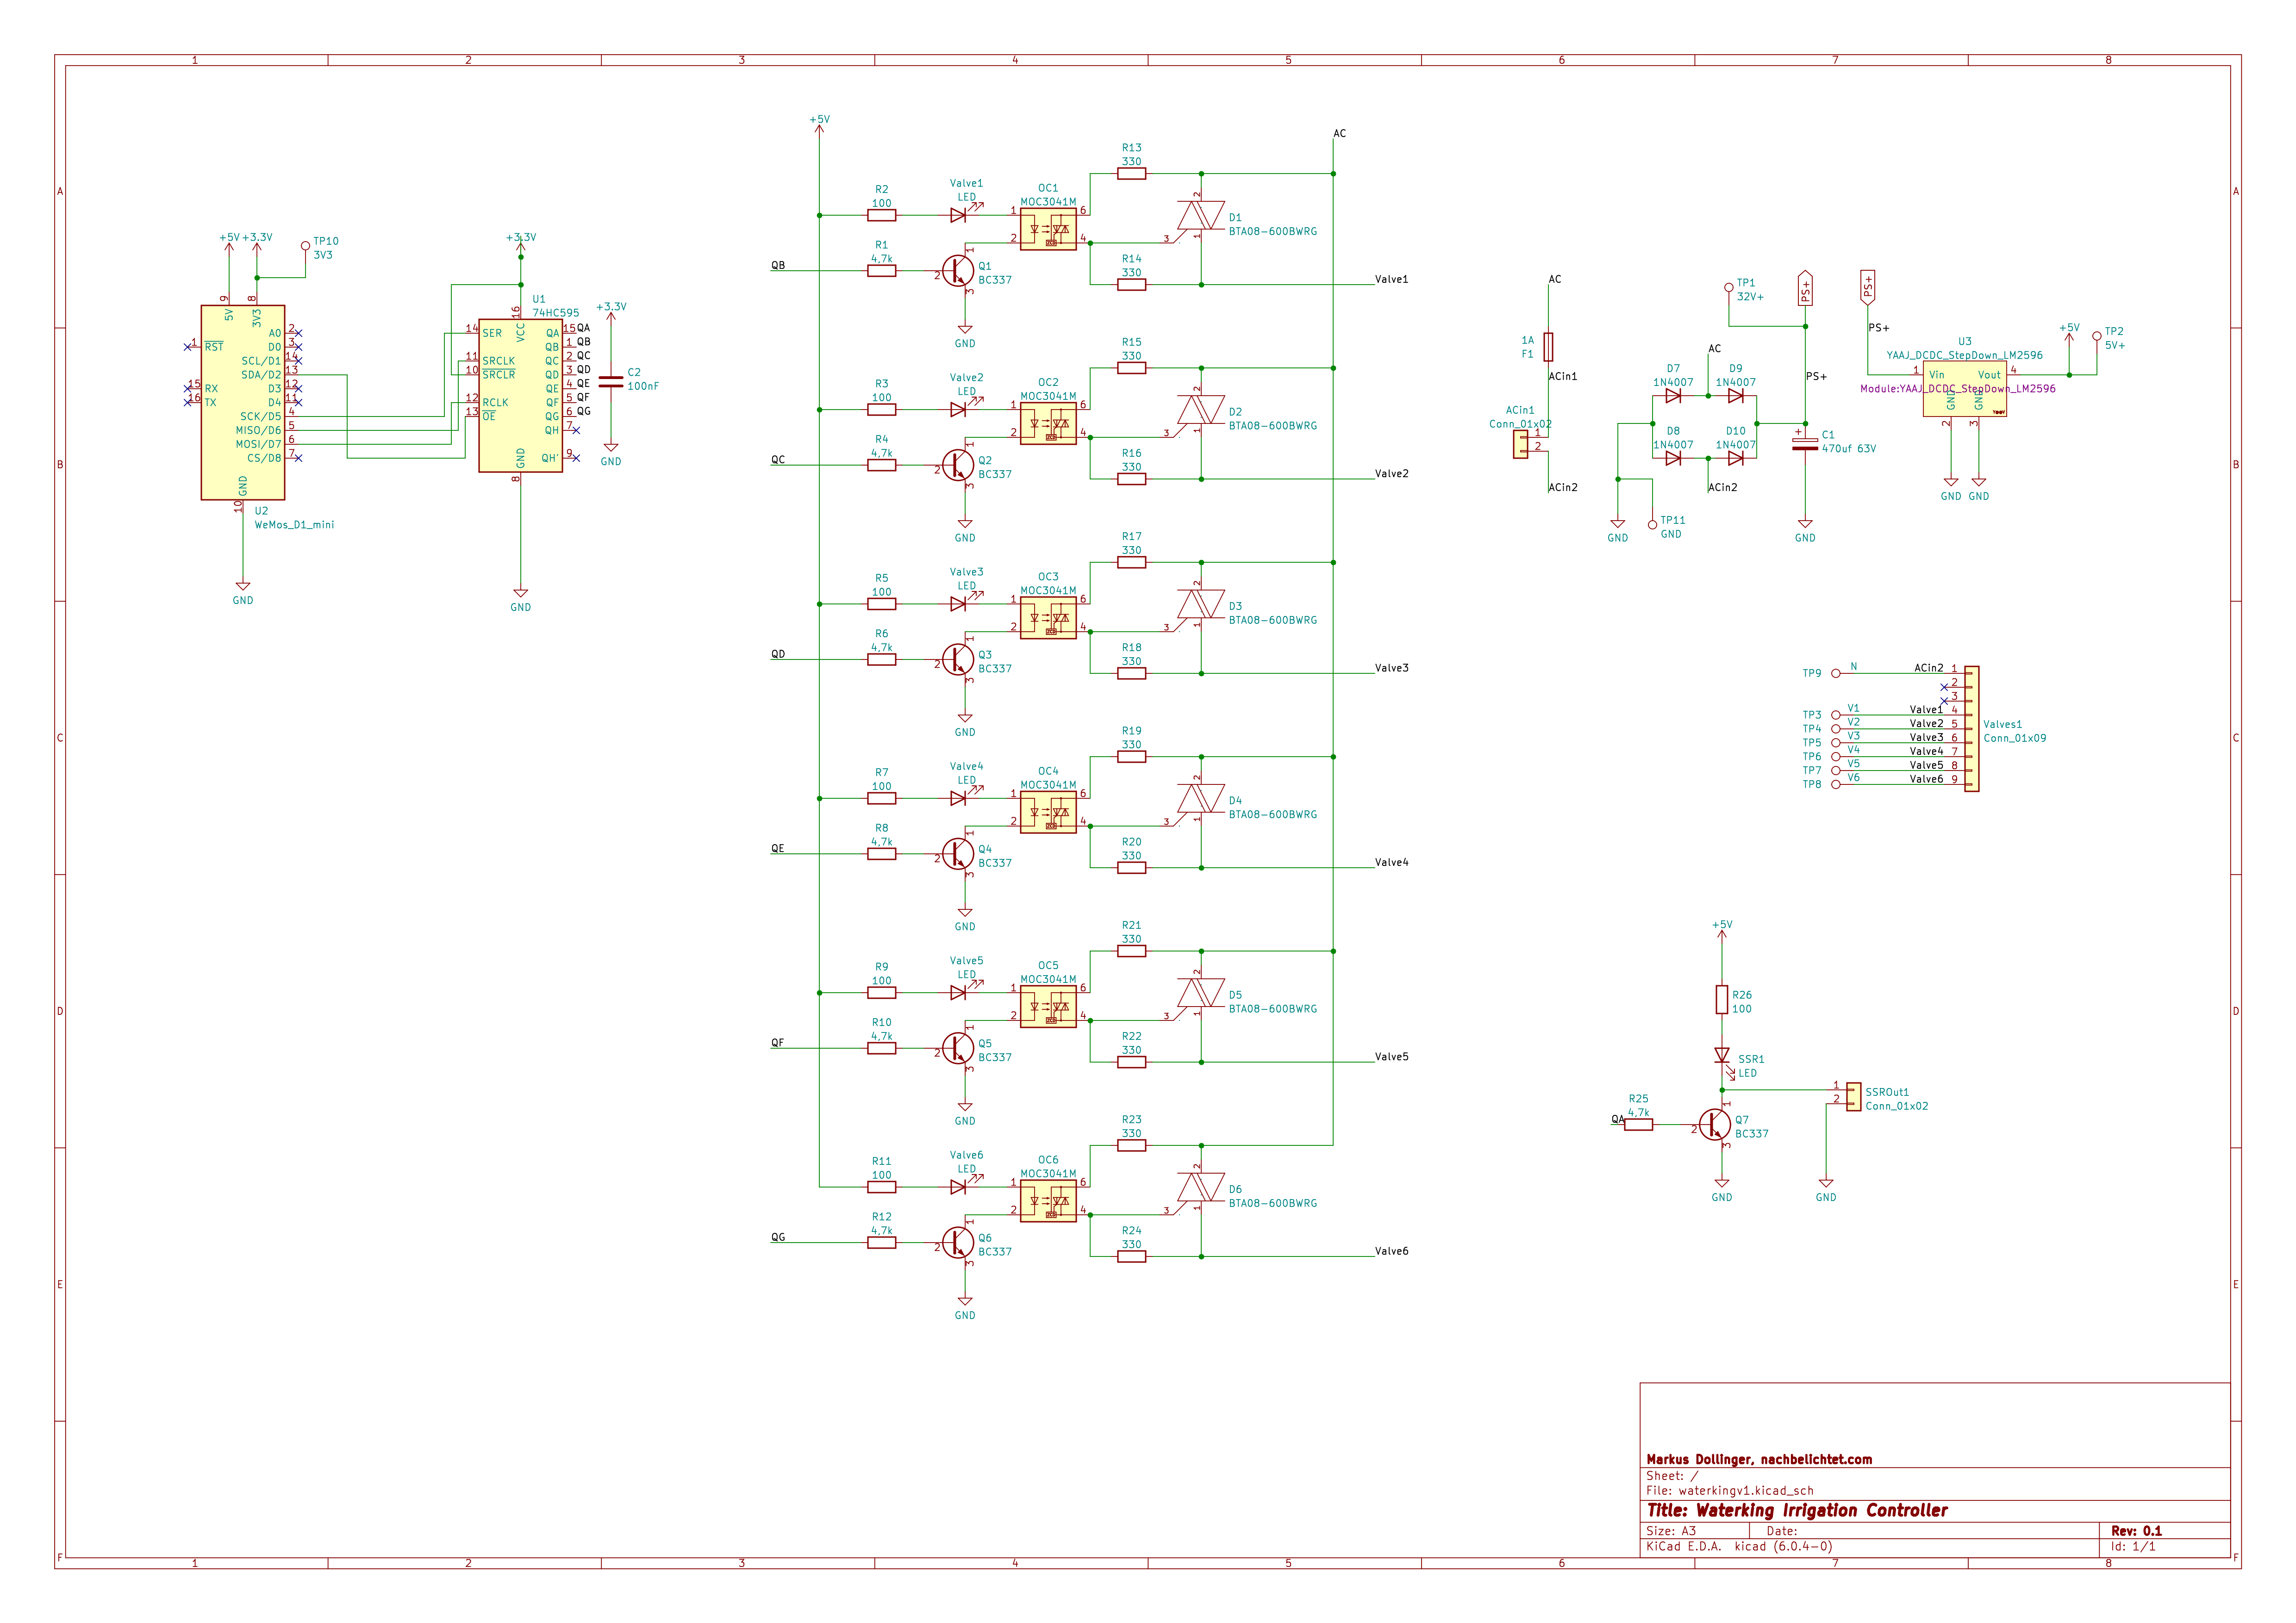
A circuit board is still missing here and perhaps I will also offer this as a kit for sale.


Leave a Reply